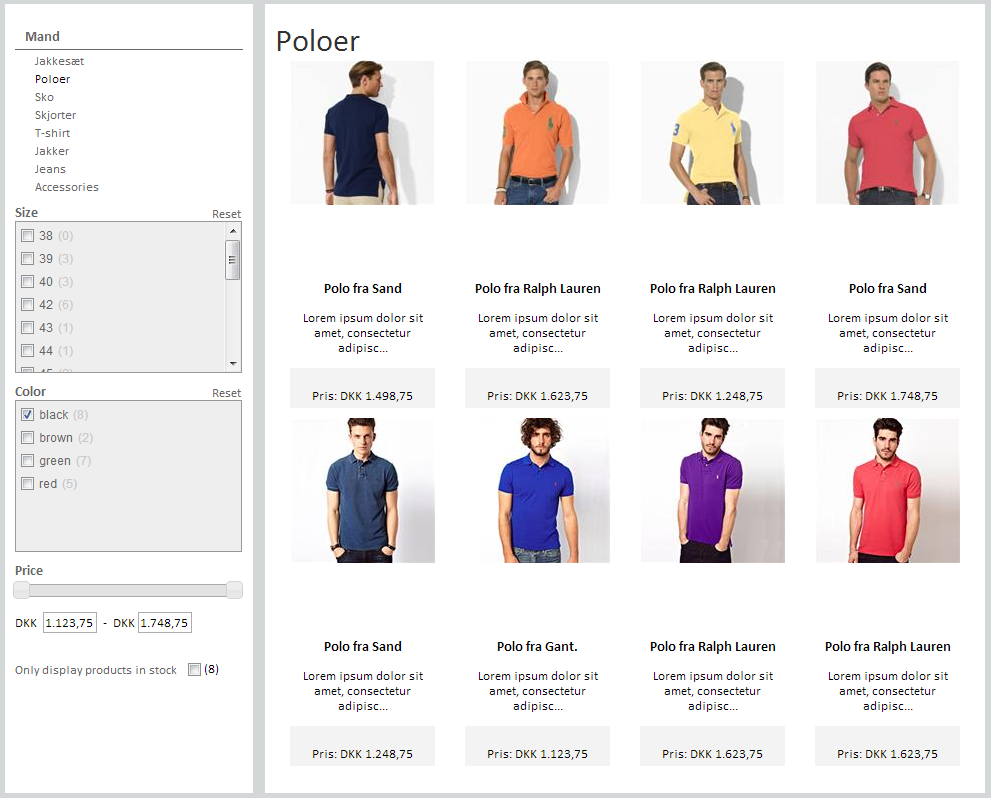
Product filtering enables your customers to quickly find what they are seeking by letting them refine their product search according to different filters such as for instance price, size or color. Thereby the customers are able to search for products within a certain price range or/and of certain sizes and colors.
A product filtering menu contains one or more product filters such as for instance price, color and size. Setting up a product filtering menu is done in three easy steps;
-
Create product filters
-
Create and setup of your product filtering menu
-
Add styling to your product filtering menu.
This tutorial will guide you through the steps and provide documentation so you are able customize product filters to suit your webshop.
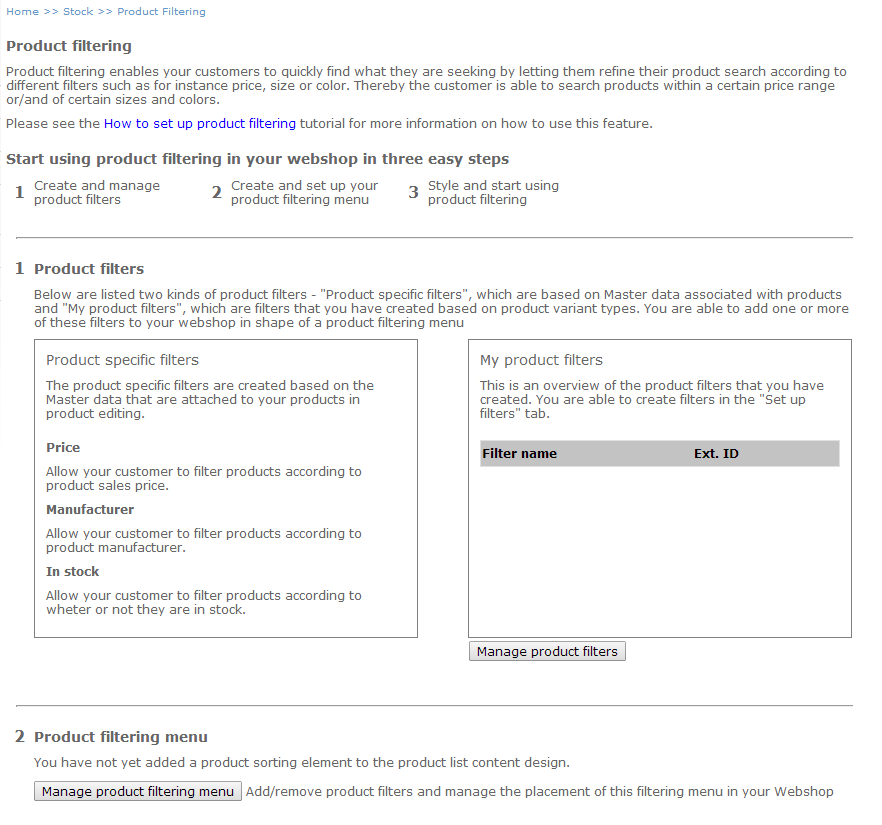
What are product filters?
A product-filtering menu comprises of one or more product filters. A product filter allows your customers to influence which products are displayed to them according to different properties of the products. For instance, a price product filter allows your customers to only see products that are falling within a certain price range. Likewise, a color product filter allows your customers to only see products of a certain color.
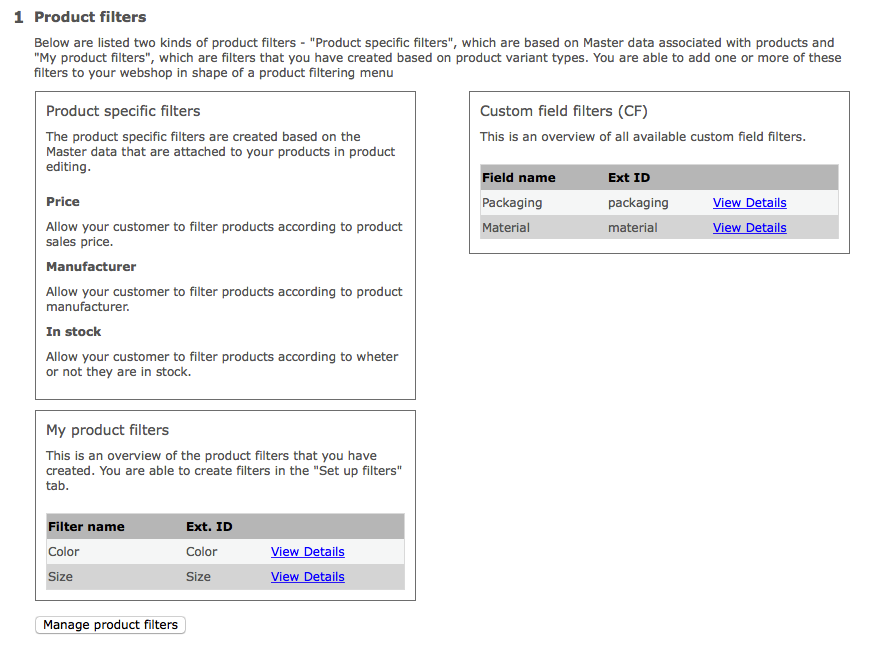
There are three kinds of product filters; Product specific filters, Variant dependent filters (“My product filters”) and Custom field filter. Product specific filters are created based on the data and properties associated with your products. These product specific filters are Price (the sales price of a product), Manufacturer (The manufacturer of the product) and Stock status (whether or not the product is in stock).
Variant dependent filters are based on the product variant types that you have created – such as "Size" or "Color".
Custom field filters are based on the custom fields that exist in the shop.
How do variant product filters work?
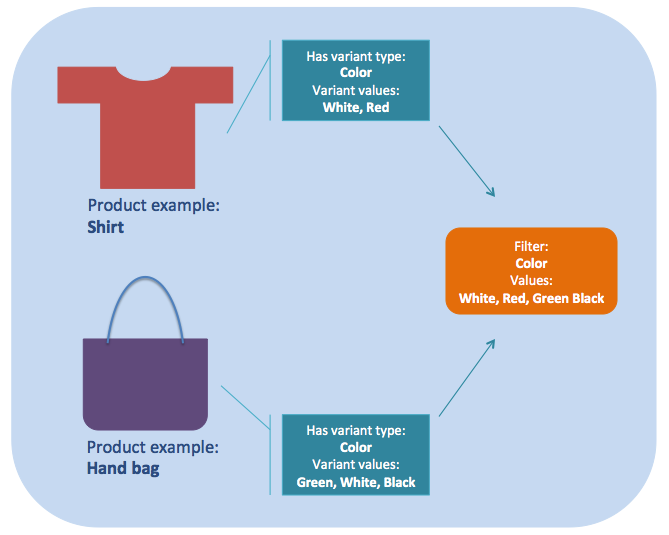
Let’s say that your webshop has a product with the variant type "Color" and the variant type values "Red" and "White" meaning that the product is available in variants of these two colors. Moreover, another product exists with the same variant type "Color" and the values "Black", "White" and "Green". You are then able to create a filter called “Color” containing the aggregate values "Red", "White", "Black" and "Green" - leaving out any duplicates (White). Thereby, many similar product variant types (dependent on how many products you have in your webshop) will all together form one product filter - for instance a Color filter.
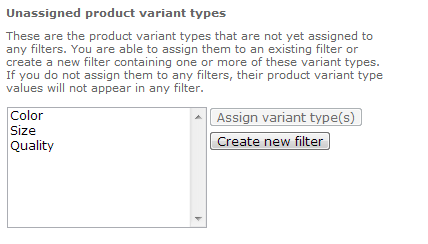
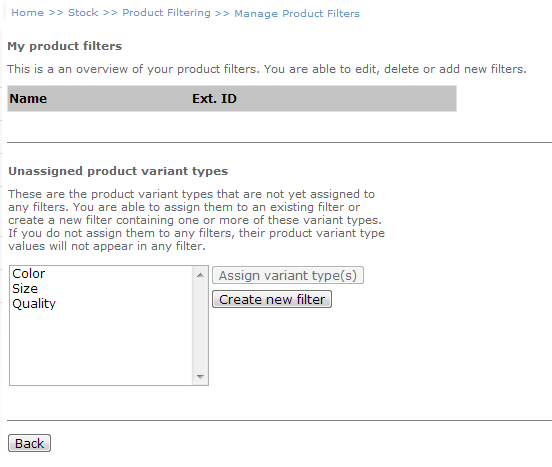
The variant types appearing in the Unassigned product variant types panel are variant types that are not yet part of any product filter. You are able to either create a new product filter based on one or more of these unassigned variant types or to assign one or more of them to an existing filter.
Note that currently variant filters do not support translations. This means that filter values such as "Green", "Red" or "Large" cannot be translated to and displayed in different languages.
Creating a product filtering menu
Now we will create a product filtering menu containing a price filter (a product specific filter), a color filter and a size filter (variant dependent filter). Please note that in order to create variant dependent filters such as color and size filters, it is necessary that variant types equivalent to “color” and “size” exist in your webshop. However, you are able to create variant dependent filters based on any variant types in your webshop.
In order to create a product filtering menu go to Stock > Product filtering.
1. Create product filters
First, we will create the product filters “Color” and “Size”. In order to do so, click the “Manage product filters” button. In the top of the page, you see an overview of your variant dependent product filters. If you have not yet created any, the list will be empty.
Click the “Create new filter” button.
You are now able to name your new filter. Since we will now create a “Color” filter, we go ahead and name it Color. You are able to specify an external ID, however if not specified, the ID will be identical with the filter name.
Next, you have to specify which variant types should be assigned to this filter. Since this is a “Color” filter, I will assign all variant types that hold color values. You are able to see what variant type values a variant type holds by hovering over it with the cursor. Select one or more variant types and click the arrow pointing to the left. Please note that you are able to select multiple variant types at once by holding down the Ctrl (Mac: command key) or Shift keys while clicking a variant type.
When the appropriate variant types have been assigned, click “Save”.
Now you can see that the newly created filter appears in the list. You are able to delete it or edit it.
Let’s create another filter allowing the customer to filter by Size. Just as before, click the “Create new filter” button; name the filter Size; assign the appropriate variant types and click “Save”.
Now both of the new filters appear in the top.
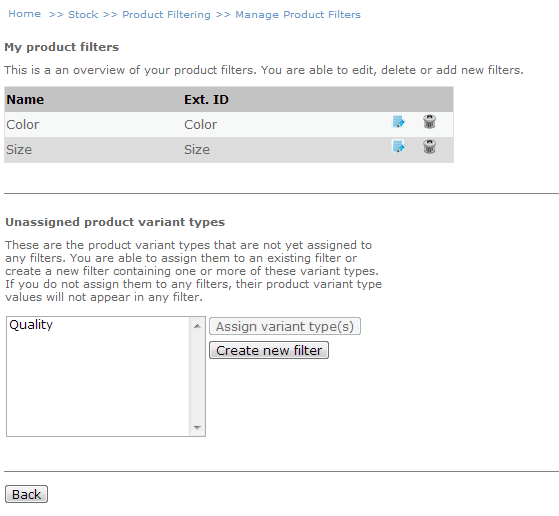
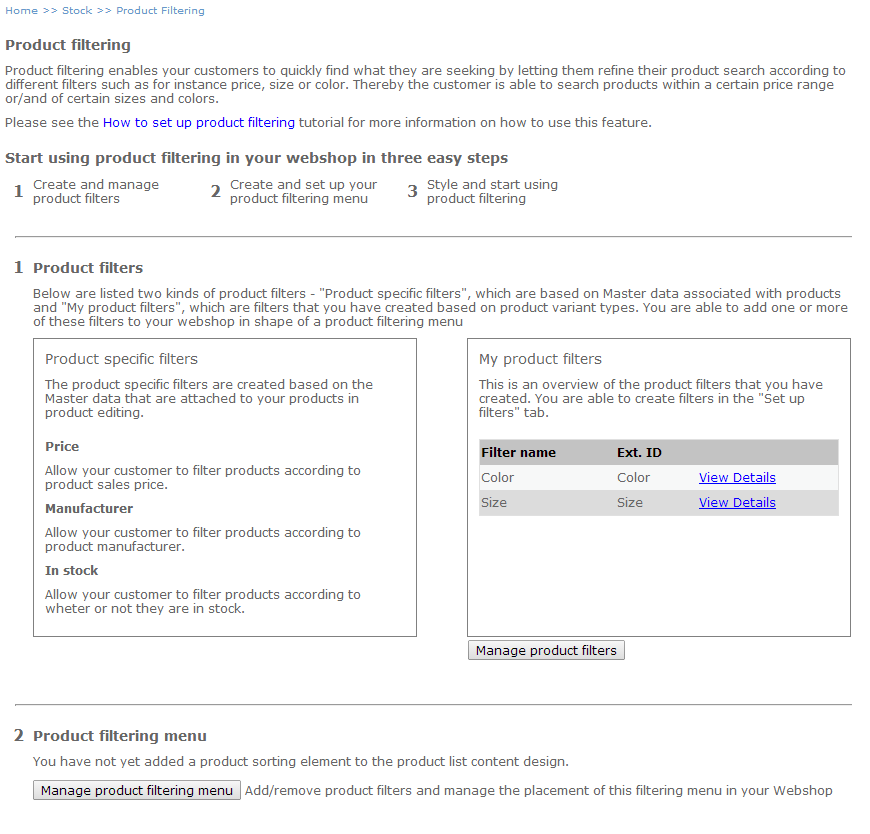
Go back to the Product Filtering page – either by clicking the “Back” button or by clicking “Product Filtering” in the breadcrumb. You will notice that the product filters you have created appear in the “My product filters” box.
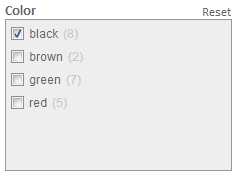
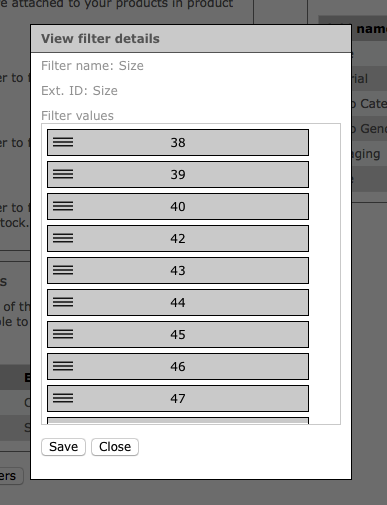
Ordering filter values
The values within product filters (such as Blue, Red, Green..) can be ordered as you wish. This is easily done by clicking "View details" for the filter for which you wish to change the ordering of the values. Drag the filter values to the desired position and click "Save". The filter values will be displayed in the shop in the order defined here.
2. Create and set up product filtering menu
Scroll to the second step and click the “Manage my product filtering menu” button.
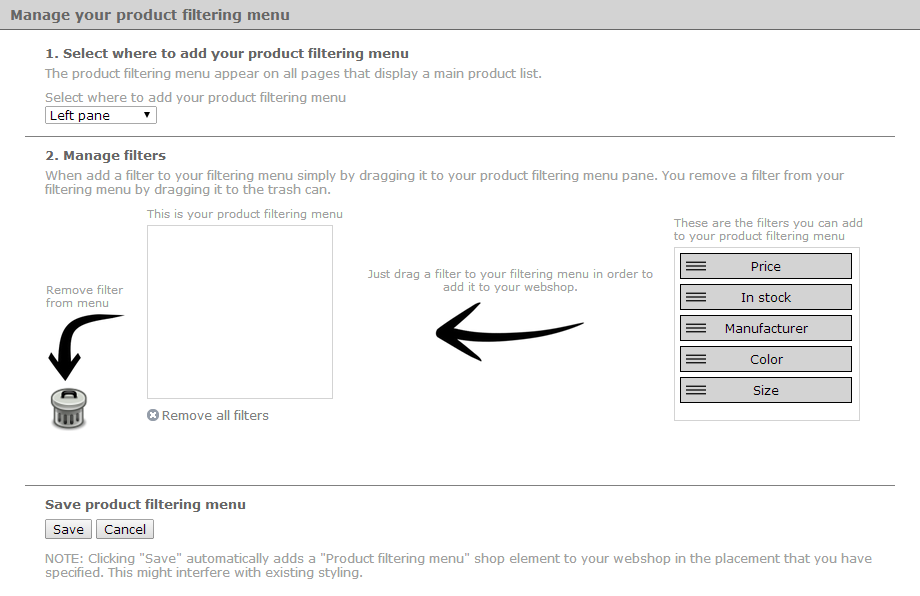
This is where you set up your product filtering menu.
First, select where you wish your product filtering menu to appear. You can select any container specified in the design template that allows shop elements. If you select the "Manual" option, no shop element will be added to any containers - you must add the shop element to a container in Page Designer yourself.
Second, select which product filters should be part of the product filtering menu. You can see that the product filters you have created appear in the container to the right along with the product specific filters Price, Manufacturer and Stock status.
Drag the filters you want to appear in your product filtering menu to the container on the left hand side, and order the filter in your product filtering menu by dragging them up/down.
Click “Save” - Be aware that clicking “Save” automatically adds the corresponding shop elements to your design, thus having impact on the styling of your webshop.
Now a shop element called Product filtering menu has been added to the "Left Pane" container of your webshop. You can find the shop element under Design > Overall design > Content Designer, select "Shopelement design" from the drop-down and click "Product filtering menu" in the list. If you go to the Definition tab of this shop element, you will see the code that has been generated for the product filters.
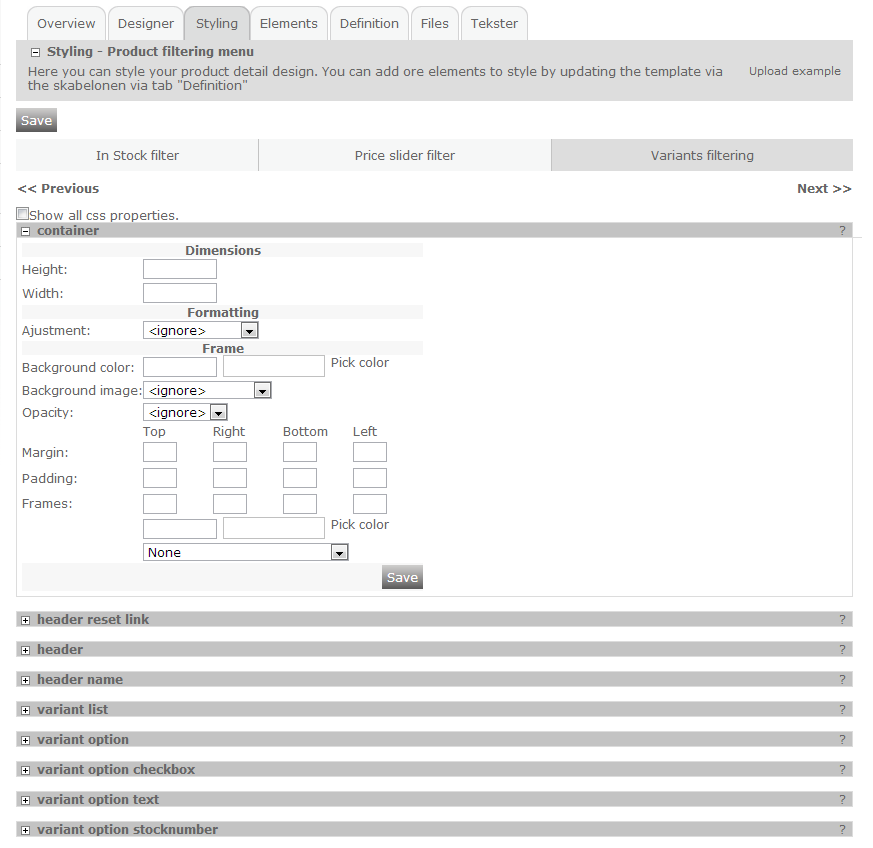
3. Add styling to the product filtering menu
You are able to style your filtering menu to suit the look and feel of your webshop. Scroll to the second step of the product filtering setup.

Here you are able to see the name of the shop element containing your product filtering menu - "Product filtering menu".
If your click the “Product filtering menu” link, you will navigate to the shop element containing the product filtering menu. From here you are able to style your filtering menu in the Styling tab and all the filters it holds either by using the controls in the Styling tab or by uploading a valid CSS document in the Files tab.
Texts
You are able to edit the headline texts for the filters and also to add translations for these texts. This is done in the Texts tab of the Product filtering menu Shop element. Here you are able to add language specific texts meaning that you can add a text to display for each active language in your shop.

Select the language for which the text should apply, add the text you wish, for instance "Price" or "Display only products in stock" and click Save.
Behind the scenes
Filters can be defined as either shop elements or content elements thus making it possible to place them virtually anywhere to suit your webshop design.
An example of the content control in the definition of a product filter shop element is displayed below:
<eSeller:Control ControlType =”ProductFilteringControl” Controlid=”ProductListFilterVariant” WorksOn=”ProductList” FilterType=”ProductVariants” FilterSource=”ColorFilter” />
This particular content control specifies that this element has the control type “ProductFilteringControl” and an ID called “ProductListFilterVariant”. Moreover, it is specified that this control works on a product list with the ControlID “ProductList” and that the type of this filter control is “ProductVariants” (meaning that it is a variant dependent filter). Lastly, it states that this control applies to a filter with the external ID “ColorFilter”.
Below is another example of a content control - this is for the price filter.
<eSeller:Control ControlType="ProductFilteringControl" Controlid="filterProductPrice" workson="ProductList" FilterType="ProductPrice" FilterSource="" DisplaySelector="Slider"/>
Using Custom Fields as filters
You are able to use any custom field in your shop as a product filter - e.g. Length, Weight, PEGI rating, Country of origin, Packaging etc., and thereby make customized filters based on specific attributes of your products.
For non-localizable custom fields, the filter values will be the native value of the custom field. For localizable custom fields, the filter values will be the localized filter value for the current languge. If no localized value exists for the current language the filter value will not be shown.
Creating Custom Field filters with the Custom Field wizard
The Product Field wizard that is used for variant filters and product specific filters also support Custom Fields. The wizard is found under Stock > Product filtering.
Any custom fields automatically appear in the "Custom field filters" pane and can be added to the product filtering menu just as variant filters and product specific filters. Below you see that two custom fields exists in this example; Material and Packaging.
Product filter wizard
Manually creating Custom Field filters
Just as with the other types of filters, custom field filters can be added manually to any content design containing a product list or a shop element used on a page with a product list. Below you see the code that represents the two custom fields used in this example.
Material custom field filter:
<eSeller:Control ControlType="ProductFilteringControl" Controlid="filterCustomFieldsmaterial" workson="ProductList" FilterType="CustomFields" FilterSource="material" DisplaySelector="CheckBoxes"/>
Packaging custom field filter:
<eSeller:Control ControlType="ProductFilteringControl" Controlid="filterCustomFieldspackaging" workson="ProductList" FilterType="CustomFields" FilterSource="packaging" DisplaySelector="CheckBoxes"/>
Building Product Filter controls
You are able to build your own filters using content controls and attributes specific to those. Below is an overview of the content control and the possible attributes and values that apply to the ProductFilteringControl.
| Attribute | Value | Description |
|---|
| ControlType | ProductFilteringControl | Defines the control type of the element. |
| Controlid | String | Defines and ID for this element - must be unique to other controls with ControlType ProductFilteringControl |
| WorksOn | String | Specifies the Control ID of the target product list |
| FilterType | ProductsInStock, ProductPrice, ProductManufacturer, ProductVariants, CustomFields /td> | Specifies the type of the filter control - f.inst. whether it is a variant dependent filter, at custom field filter or one of the product specific filters. |
| DefaultValue | True, False | Is only applicable to content controls with the ProductInStock FilterType. Specifies whether or not the box should be checked per default. |
| DisplaySelector | CheckBoxes, Slider | Defines what kind of selector should be used for the filter. |
| AutoPostbackTime | Time in miliseconds after which the page will reload after a filter selection has changed. | When not specified 1000 milliseconds will be applied (1 second). |
| FilterSource | String | Is only applicable to content controls with the ProductVariants of CustomFields FilterType. Specifies the External ID of the variant filter or of the custom field - see the image below. |
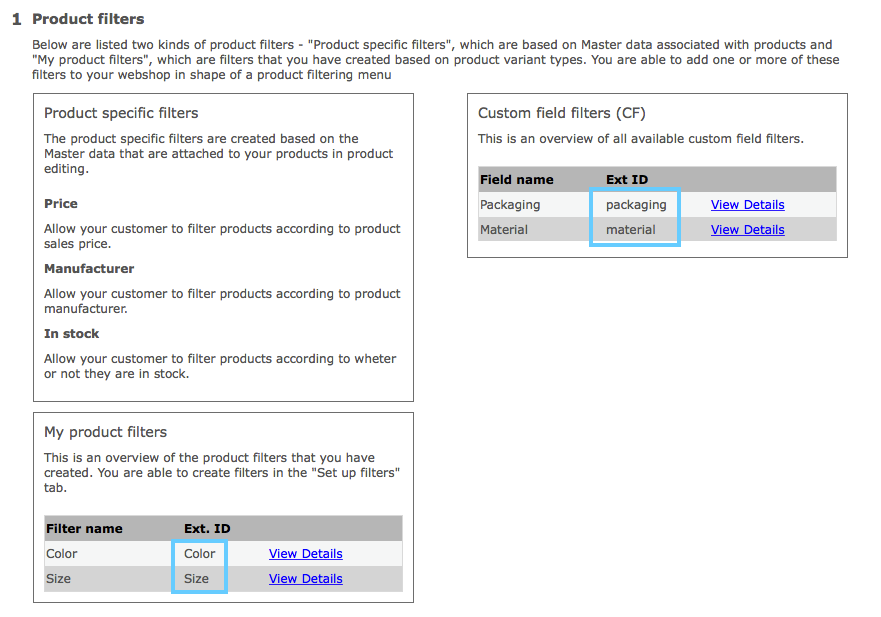
Illustration of the Variant filter ID and Custom field ID.
What values are displayed in the product filter?
If a product list can be refined by multiple filters, the values that are available in each filter depends on whether filter values are selected across different filters. This means that which values are displayed in a filter depends on what values are selected in any other filters. This behavior ensures that no filter combinations that result in an empty product list are displayed ("dead ends").
When determining which filter values to display, the filter looks at the available products. The “available products” is the filtered list of products based on any filter values set in any filter other than the filter itself - let’s call this pool of available products “P”. Based on this, the filter only displays filter values that apply for at least one of the products in "P".
EXAMPLE
Let’s say we have a shop selling lamps. For a product list there are three filters; Color, Manufacturer and Type.
The filters have the following values:
Color: Red, White, Black
Manufacturer: Muuto, HAY, Kartell
Type: Table lamp, Floor lamp, Ceiling lamp
Now, let’s say that we choose to filter the product list by the following values:
Color=Red, Color=Black, Manufacturer=Kartell
- which means that we are only interested in seeing products in the colors Red or Black and which have the manufacturer “Kartell”.
In order for the filters to determine which filter values to display with the current filter setting, the following rules apply for the filters:
Color: only displays filter values that apply for products in P with the value Manufacturer=Kartell
Manufacturer: only displays filter values that apply for products in P with the values Color=Red or Color=Black
Type: only displays filter values that apply for products in P with the values Color=Red or Color=Black and Manufacturer=Kartell.