Typically your NAV consultant will handle all the setup of the integration types, which means you do not have to change anything yourself.
The following will help you understand the different fields in the integration types list. For an explanation of the connection between Dynamics NAV and eSeller, please see connection between Dynamics NAV and eSeller Cloud.
To find the list of integration types, search for “eSeller Integ. types” in the searchfield in the top right corner.
The list contains the following fields:
| Field | Description |
|---|
| Code |
This field defines the code used in the rest of the system in reference to this integration type. It can be anything, but it is recommended that the code has some meaning, which can easily be understood. |
| Description |
The description of the integration type, which can be written any way you like. Typically this will be a brief description of what the integration type does. |
| Ingoing/Outgoing |
Defines whether the integration is Outgoing, Ingoing or Out- & Ingoing.
- Outgoing: Exports information from Dynamics NAV to the webshop.
- Ingoing: Imports information from the webshop into Dynamics NAV.
- Out- & Ingoing: Dynamics NAV sends a request to the webshop and the webshop sends the requested information.
|
| FTP Code |
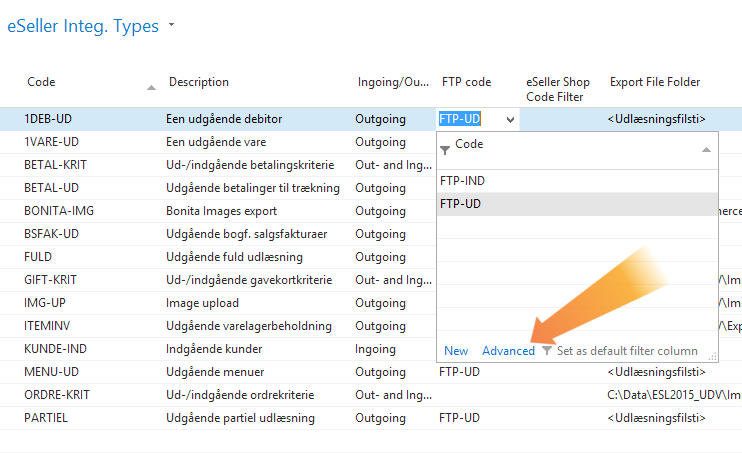
Selects which FTP account the information is sent to, and can be selected from the dropdown. Remember to check if there is a username and password connected by clicking advanced in the bottom of the dropdown.
If there is no accounts available from the dropdown, you should create a new one using the FTP information from eSeller.
For more information on this, please see .
|
| eSeller Shop Code Filter |
Allows you to select which shops should be affected by the integration. If the field is left blank, all shops will be affected. |
| Export File Folder |
The path to where the exported file should be stored, e.g. a folder on a desktop or a drive.
UNC paths is the accepted format.
If in doubt, ask your NAV consultant. |
| Export File Folder (Archive) |
The path to where the exported files should be archived once they have been exported. |
| Export File Name |
Do not change this. This is the name of the file once it has been exported. |
| Export File Name (temp) |
Do not change this. This is the name of the temporary file created during exportation. |
| Export File Folder (FTP) |
The path to where the file should be stored before it can be uploaded to the FTP server.
This will usually be the same folder as the Export File Folder. |
| FTP Upload File CU No. |
Do not change this. It corresponds to a development functionality used to upload data from the eSeller Cloud. |
| FTP Upload File CU Name |
This will automatically be filled in as the “FTP Upload File CU No.” is added or changed. |
| Export File Main Tag Name |
Do not change this. This is the file tag used in XML transfers. |
| Export File Encoding Tag Text |
Do not change this. This is the encoding tag used in the XML file transformation. |
| Import File Folder |
The path to where the imported file should be stored, e.g. a folder on a local drive.
The path could also be an UNC path for a shared network drive if multiple people should import files. |
| Import File Folder (Archive) |
The path to where the imported files should be archived once they have been imported. |
| Import File Name |
Do not change this. This is the name of the file once it has been imported. |
| Import File Name (temp) |
Do not change this. This is the name of the temporary file created during importation. |
| FTP Download File CU No. |
Do not change this. It corresponds to a development functionality used to download data from the eSeller Cloud. |
| FTP Download File CU Name |
This will automatically be filled in as the “FTP Download File CU No.” is added or changed. |
| FTP Download File name |
Do not change this. This is the name of the file downloaded from the FTP server. |
| Post Download CU No. |
Do not change this. It corresponds to a development functionality that can be run after data has been downloaded from the eSeller Cloud. |
| Post Download CU Name |
This will automatically be filled in as the “Post Download CU No.” is added or changed. |
| Min. File Size (bytes) |
If the file is smaller than the entered size - i.e. it has no content - the file is not imported. |
| Resend File First |
This is only used for payment integrations.
If checked, the file is not deleted from the queue before it has been transferred correctly. |
Setting up an FTP account
To be able to transfer data between Dynamics NAV and eSeller, you need to set up an FTP account.
First you need to make sure you have FTP set up in eSeller, from which you will need the Username and Password.
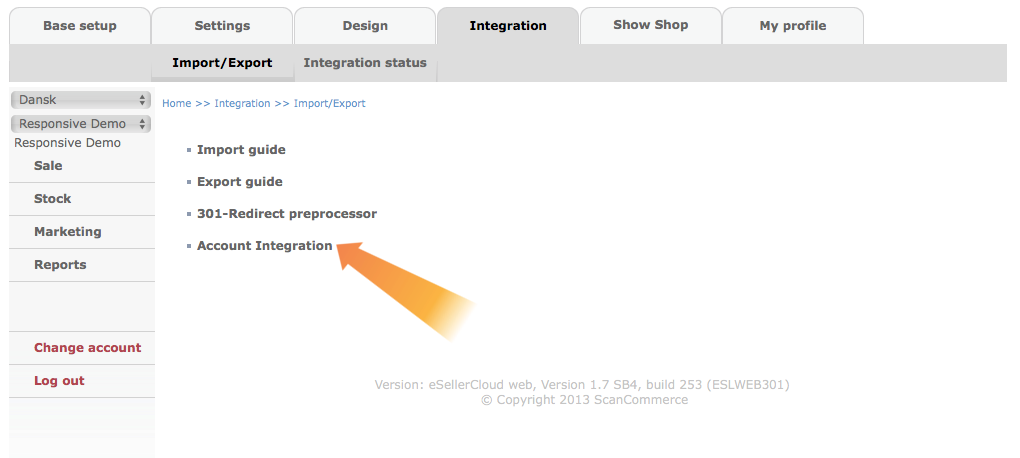
To do this, login to eSeller Cloud and click “Integration” from the tabs in the top.

Then from the menu below the tabs, select “Import/Export”.

Then select “Account Integration” from the list on the screen, as shown below.
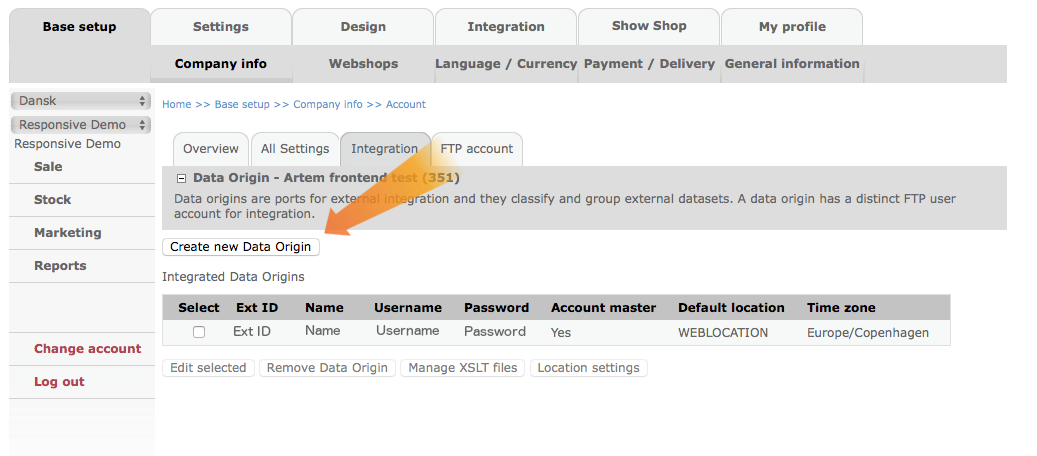
From this page you will be able to check if you have an account already set up by looking at the list. If you have an account set up already, you will need the username and password.
If you do not have any rows in the list, click “Create new Data Origin” to set up a new account. The example below already has one account set up.
This will open a new window, where you need to enter an Ext ID and a name.
These can be whatever you like, as long as it is relevant and memorable. The rest of the content will automatically be filled for you.
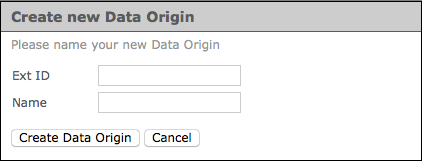
Then you simply click “Create Data Origin”, which returns you the the previous screen.
From here you can see the account in the list, from which you will need the username and password.
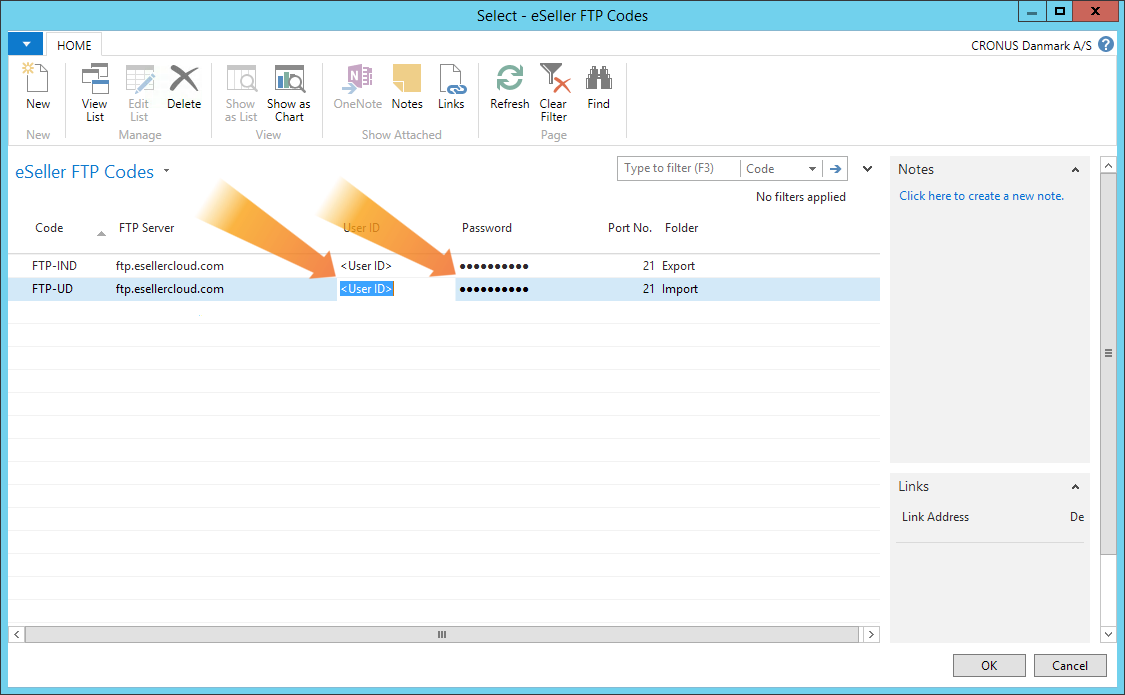
You can then return to integration types in Dynamics NAV. In the dropdown under “FTP Code” click “Advanced”, which will open a new window. There will typically be two options available, “FTP-OUT” and “FTP-IN”, in the example FTP-UD and FTP-IND.
To add your username and password to these, click “Edit List” in the top of the window.
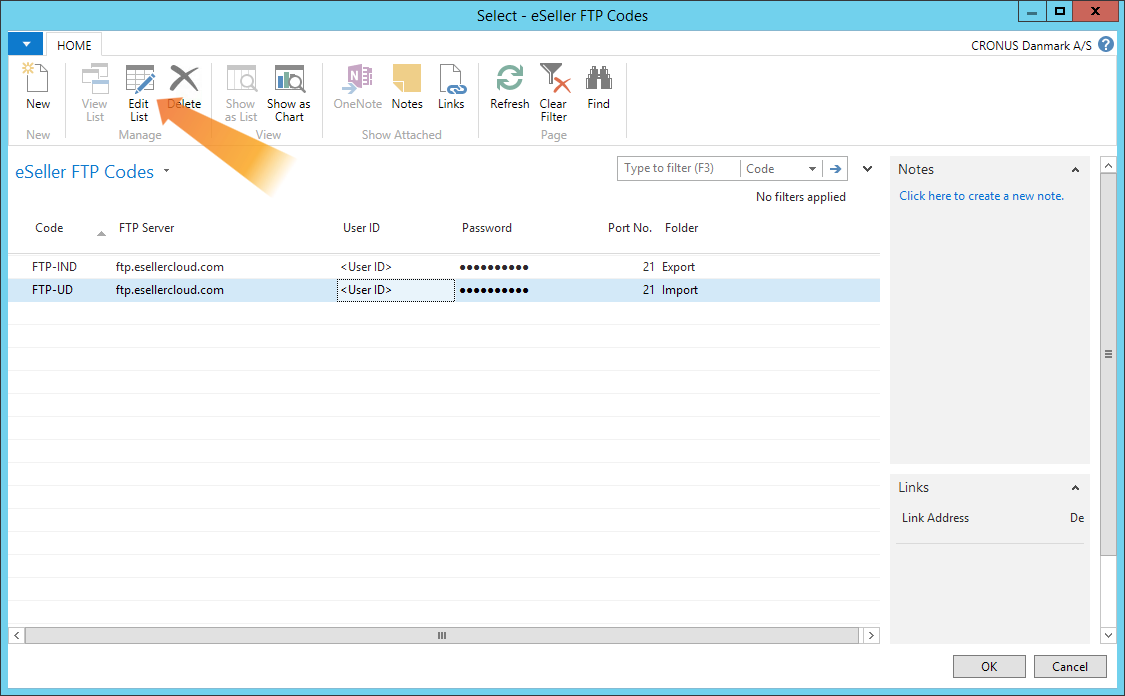
This will allow you to change the value of the “User ID” and “Password” fields to the username and password from eSeller. These are the only ones you should change, as the rest of the values should be set up correctly automatically.
