Product discount groups allow you to set up discounts that apply to all customers, a single customer or to a customer discount group that you have created. For each product discount group you are able to create one or more discounts that are applicable to different customers/customer groups. Thereby, you are able to apply a product discount group to a product that for one customer discount group gives a 10% discount and for another discount group a gives 20% discount whilst all customers get a 5% discount. Note that discounts will not be added together.
In order to create a new product discount group, go to Stock > Product editing > Product discount groups.
Click the “Create new” button
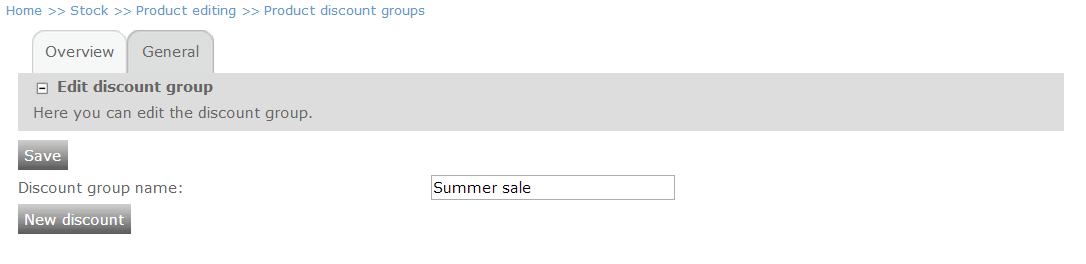
Name your new discount group. This is the name that will appear in product editing where you are able to select a discount group that should apply to the product.
Click “Save”
Click “New discount”
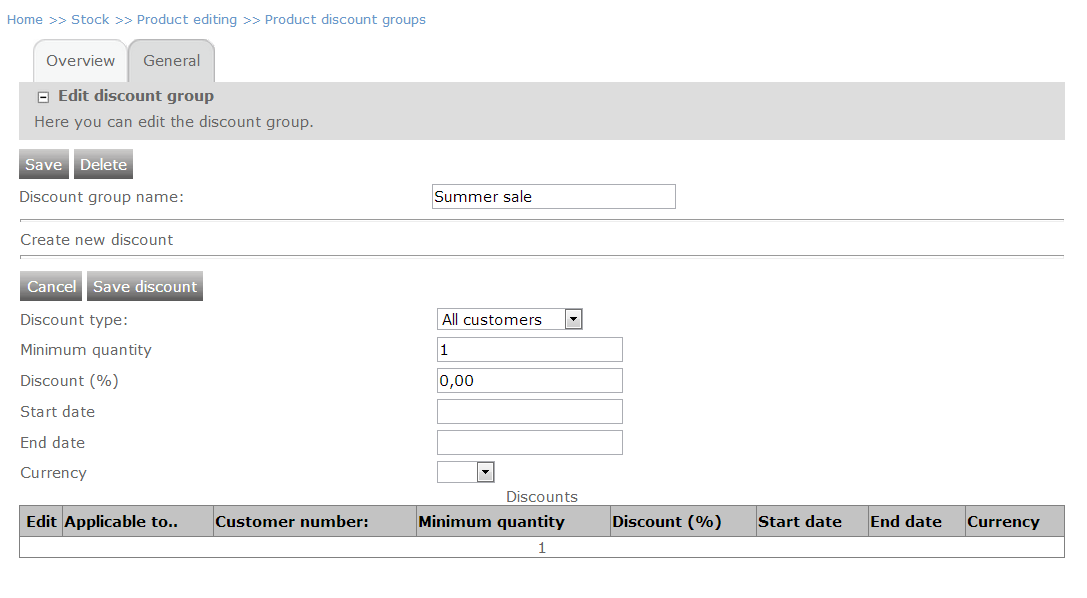
Select Discount type. This is an option where you select which of your customers will get the discount. You can choose all customers, a single customer or a (customer) discount group that you have created. If you choose a single customer, you must then choose a customer from the customer list that appears below. For this option it is possible to choose only one customer. If you wish to give a discount to some but not all customers, you are able to create a customer discount group and choose it as the discount type. If you have already created one or more customer discount group(s) they will appear in a list below, where you are able to select one.
Select a minimum quantity. This specifies the quantity of this product your customer has to order in order to get the discount.
Specify the discount percentage that you wish to apply to the product. For example, for a 5% discount type in “5” or for a 20% discount type in “20”.
Moreover, you are able to specify a time frame within which the discount is valid. This is optional, and if you do not enter a start and end date, the discount will be valid until you delete it.
Lastly, you are able to specify for which currency the discount should apply.
Click “Save discount” and notice that the discount appears in the table below.
As mentioned, it is possible to create more than one discount for each product discount group. The image below shows a product discount group called “Summer sale” that specifies that all customers get a 10% discount on the products associated with this product discount group from 1/7-2013 to 29/7-2013. Moreover, it specifies that the customers in the “Large customer” discount group get a 25% discount in the same period.

Now it is time to select the products that I wish to be included by the discount. In order to do this, I go to Stock > Product editing > Product list and pick a product I want my product discount group to apply to. Select a product by clicking it in the product list.
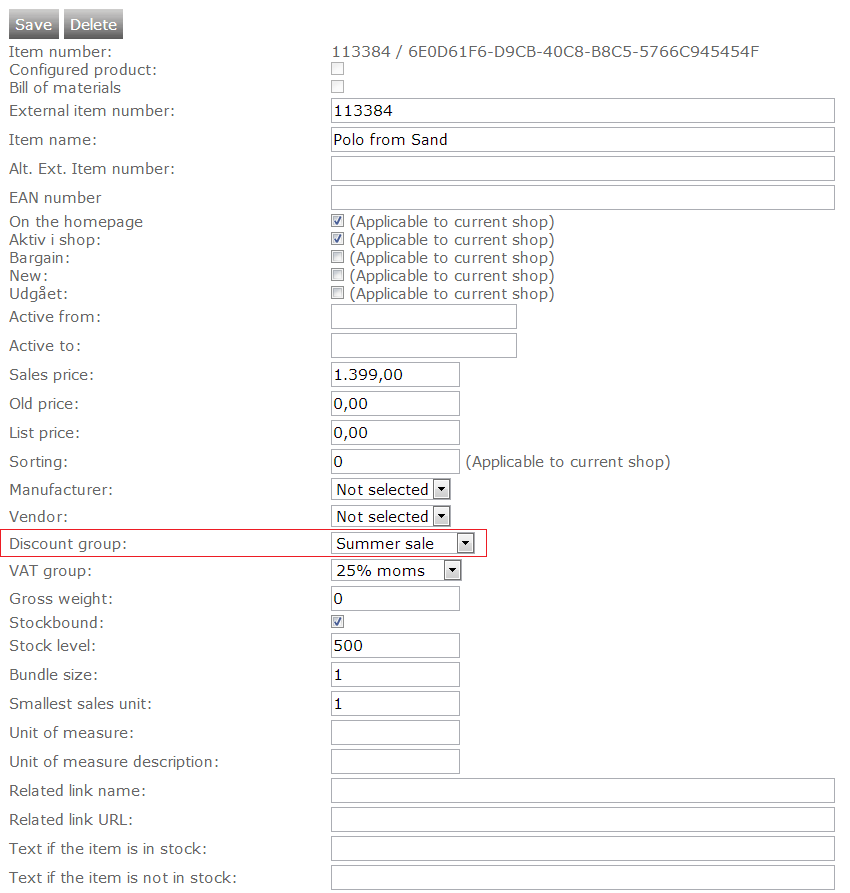
Click the “Discount group” drop-down and select the Product discount group that you have just created.
Click “Save”.
That’s it! – Now this product will be discounted 10% for all customers and discounted 20% for all customers that are part of the “Large customer” customer discount group that I have created.
If you want to remove a product from the product discount group, simply go to product editing, click the “Discount group” drop-down and select “Not selected” – remember to save your changes.