Customer discount groups allow you to create groups of customers to which certain discounts on certain products should apply. The discount is set by a product discount group.
In order to set up a customer discount group, go to Sale > Discount > Customer discount groups.
Click “Create new”

Name your customer discount group and provide it with an ID. The ID is for system purposes only and must be unique – meaning that you cannot use the same ID for two different customer discount groups. The customer discount group name will be appearing in customer editing where you are able to add a customer to the customer discount group (this step will be covered later in this tutorial).
Click “Save”
Now you are able to create a product discount group for your customer discount group. With the product discount group you specify the discount percentage (for instance 10% discount) as well as a start and end date for the validity of the discount. See this tutorial on how to set up a product discount group.
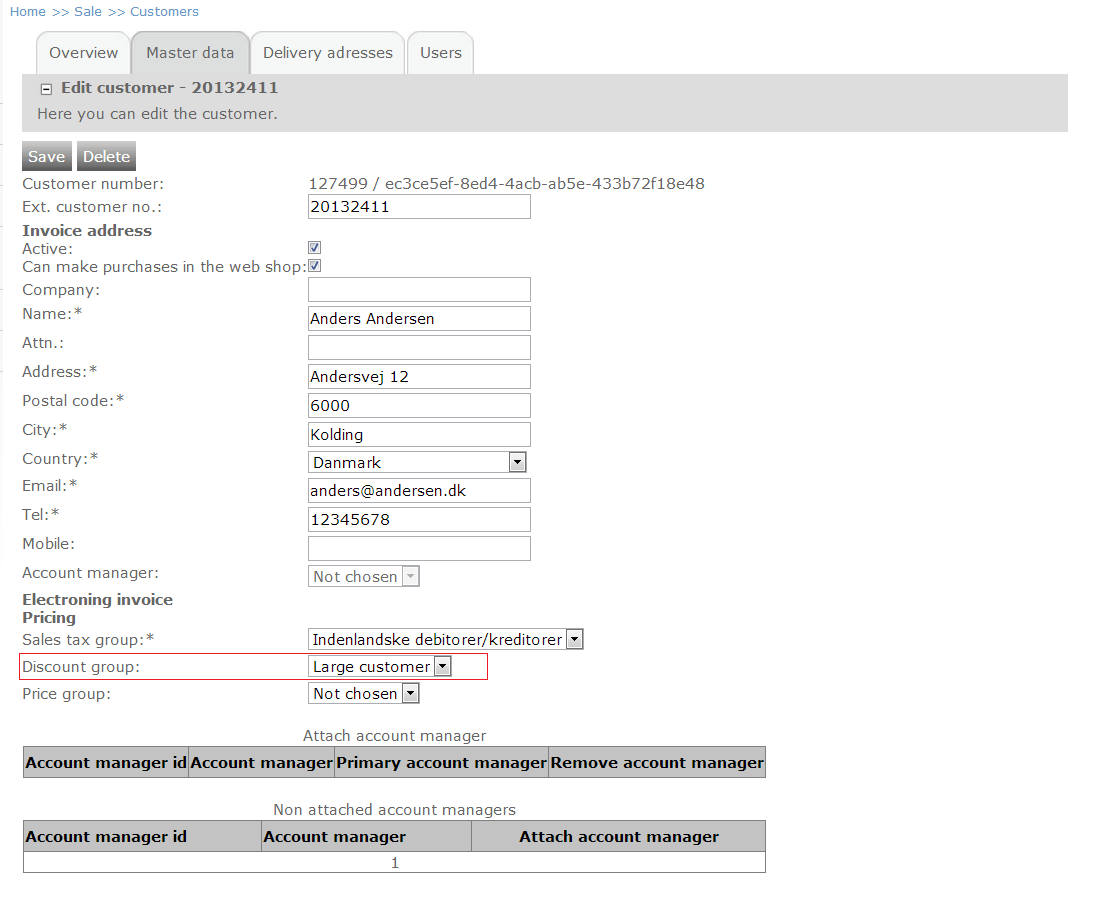
In order to add a customer to your customer discount group, go to Sale > Customers and select a customer.

Click the Discount group drop-down menu and select the customer discount group that you have just created.
Click “Save”
You are able to add this customer discount group to all the customers you want and only customers that are part of this customer discount group will receive the discounts specified in the product discount group that this customer discount group is applied to.
If you wish to remove a customer from the customer discount group, simply select "Not selected" in the Discount group drop-down and click "Save".
Multiple customer discount groups
It is possible to assign customers to multiple customer discount groups. This means that all line discounts applicable to the specified discount group(s) will be available to the customer.
Currently assigning multiple customer discount groups is only supported for integrated shops (shops that get data via the FTP import).