Configured products enable you to create products that the customer can configure in respect to configuration groups created for the product. A configuration group typically consists of products that are not available for purchase separately or that in some way relates to or is part of the configured product.
We do not recommend anyone with integrated shops to use this feature, as it is not supported by integration. The scope of this feature is no more than what is described in this article and may be limited in functionality when using different services (e.g. JSON product service). Moreover, this feature is not supported by basket API.
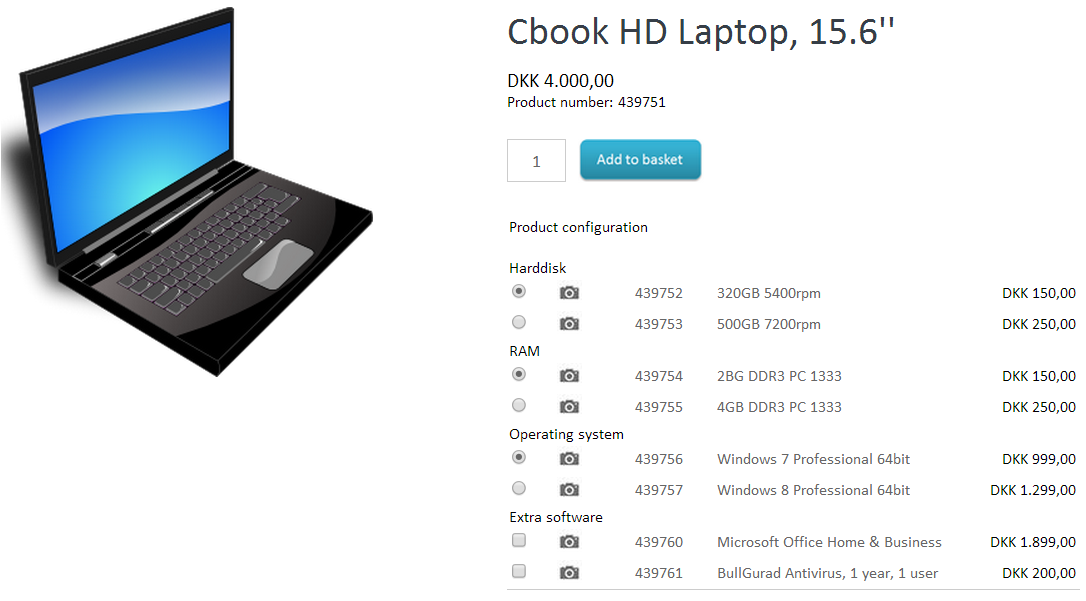
In this tutorial, we will create a laptop computer as a configured product where the customer is able to configure the laptop by selecting the harddisk, memory (RAM), operating system and possibly order extra software some of which may be required.
In order to create a configured product, go to Stock > Product editing > Product list and select the product you wish to make configurable by clicking it in the product list. Please note that a product cannot be both a configured product and a product variant. Also, a configured product cannot contain other configured products.
Click the “Configuration” tab
Click the “Create new” button
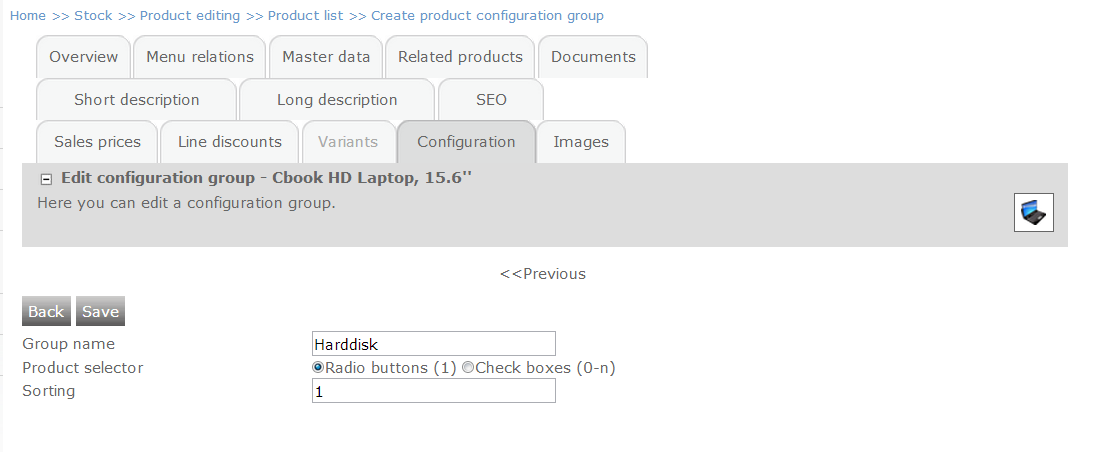
Specify the group name. In this example, the group name is “Harddisk”. The group name help the customer identify the type of the configuration.
Choose a product selector. Radio buttons allow the customer to select exactly one item in the group. Checkboxes allow the customer to select none or more items in the group. Therefore, if the customer is only supposed to select one of the options in the configuration group, radio buttons are appropriate. Since the group name is “Harddisk” and a laptop can only have one harddisk, the radio button is an appropriate product selector.
The sorting value specifies the order in which different configuration groups are listed. If Sorting is set to “1”, it indicates that the group should appear first. “2” would appear second, “3” would appear third and so forth.
Click the “Save” button.
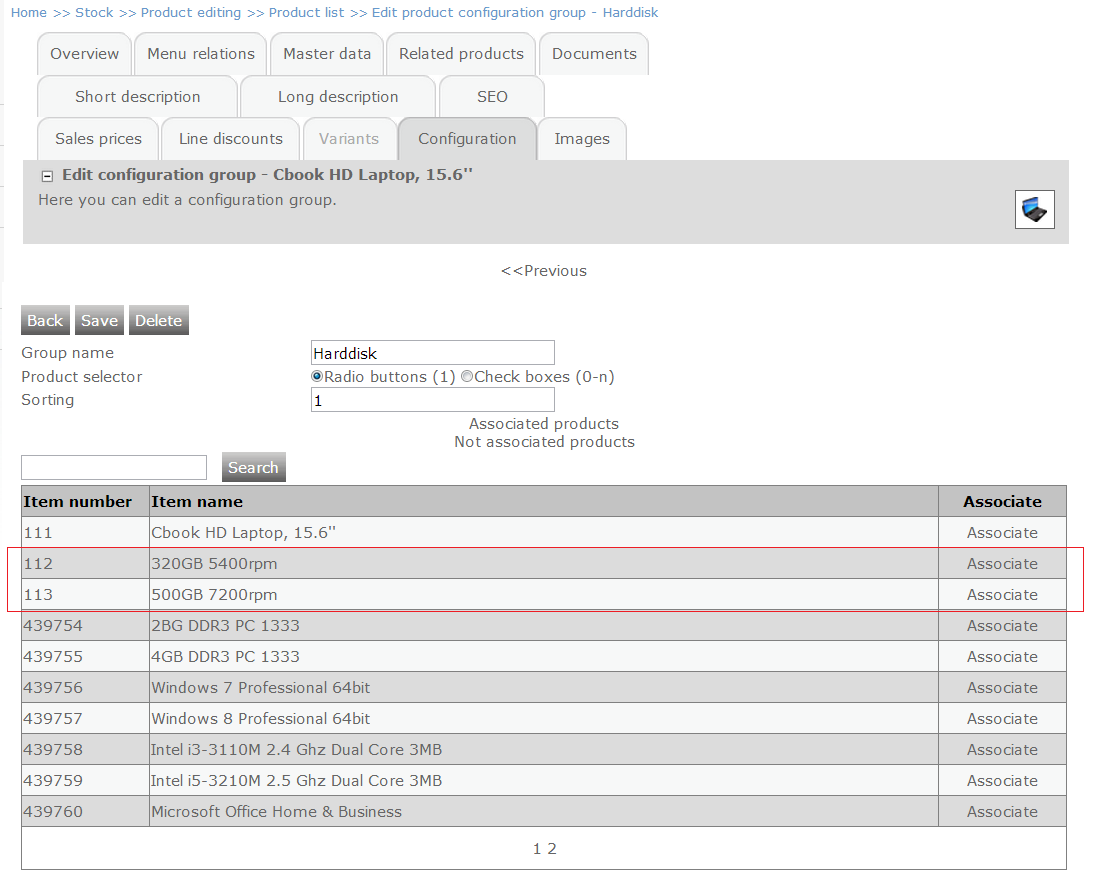
Now you are able to associate the products that you want to be part of the configuration group. Associate a product by clicking “Associate”. In this tutorial, two items should be associated – namely the ones that are harddisks.
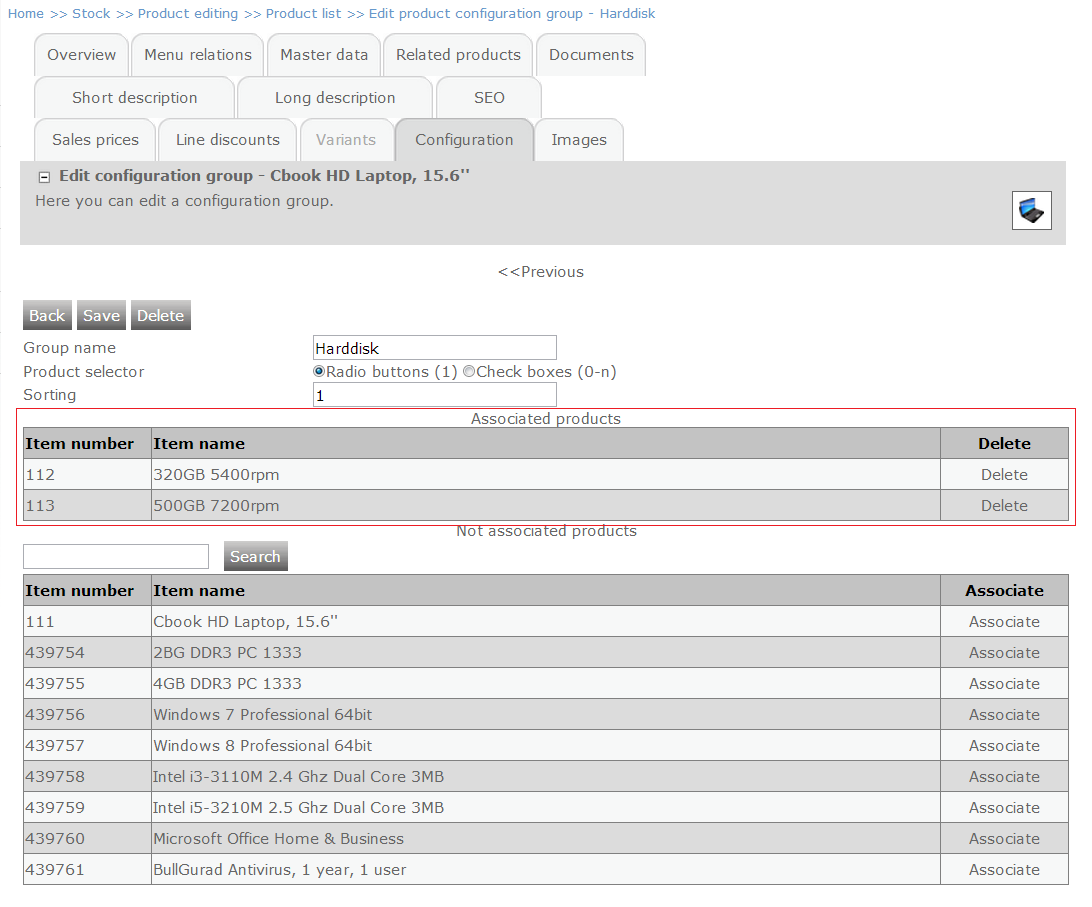
You can see that the associated products appear below the “Associated products” headline. You are able to remove the association by clicking “Delete”. Please note, that this does not delete the actual product, but only the association.
When you have associated all the relevant products, click “Save”.
Now you are able to navigate to the configured product in your Webshop and see that the configuration option has been added.
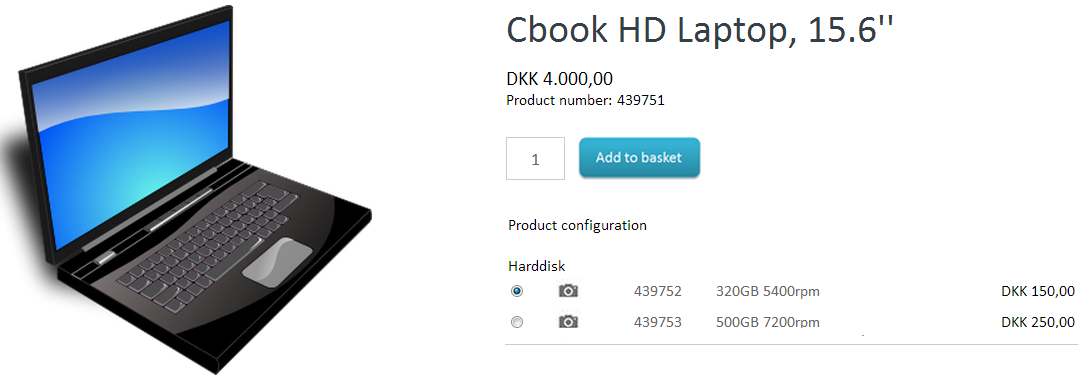
You can add several configuration groups just as you did before and thereby make the product configurable in several ways.

Here you can see that the Cbook Laptop is configurable in respect to the configuration groups “Harddisk”, “RAM”, “Operating system” and “Extra software”. The last group has check boxes instead of radio buttons, which means that the customer does not have to select any of the options from the “Extra software” configuration group – however, the customer is able to select both items in the group if he wishes to. Since the other group items are selected with radio buttons, it means that the customer has to select only one of the items in the groups.