eSeller Cloud is equipped with a powerful import wizard that allows you to import data from a variety of sources.
A common usage for the import wizard is to import product data into a non-ERP-integrated web shop. Using the import wizard allows you to add thousands of products in minutes.
This tutorial will demonstrate how to import product variants into a shop using the Import Wizard in the shop administration. The CSV file used for this tutorial can be downloaded from the resources section at the bottom of the page.
Before we get started please consider the following ground rules:
-
Imports cannot be undone - If you are uncertain about an import, we suggest that you limit the import to only a few products as this will make any subsequent manual cleanup much easier for you.
-
Products are matched against the External Product ID. If you import data that contains an already existing External Product ID, the available data from the import will used to update the existing product in the shop.
-
Product variants are matched against the External Product Variant ID. Like products, if you import data that contains information about an already existing variant, the data from the import will be used to update the data in the shop.
-
It is currently not possible to export variants.
Importing variants
In this tutorial we will be uploading CSV data containing data about two different products: blouses and bags. These two products are sold in different sizes and colors (Variants). Looking at the CSV file we can determine that it is possible to buy blouses in size small in both red and green color whereas blouses in size large only exist in the color green.
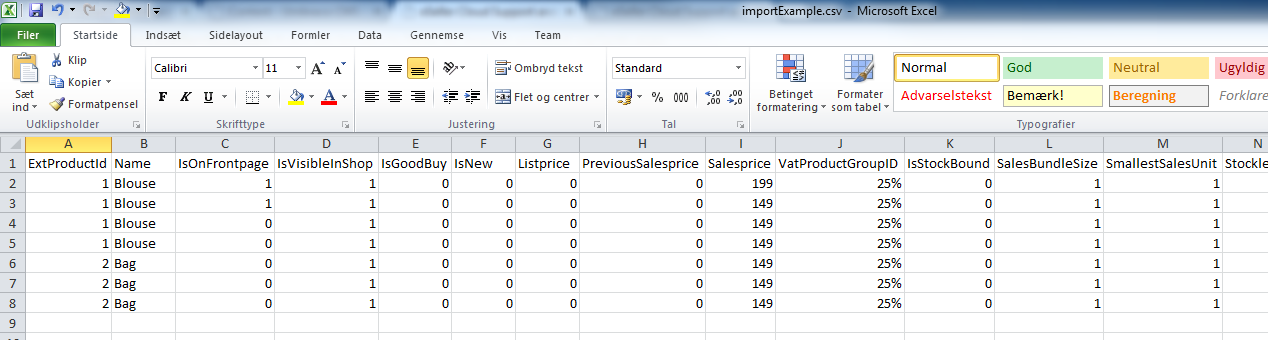
Product variant CSV file (Some columns hidden)
In this simple example we have two variant dimensions, size and color but it is possible to import up to 5 dimensions and eSeller Cloud supports an unlimited number of dimensions.
In this tutorial we want to be able to update the stock level by re-uploading the CSV file. Because of this, we need a unique identifier for each variant and this is currently not available in the CSV file. To create the unique identifiers we use Excel to combine the product ID and each of the variant dimension values using the Concatenate function as shown in the screenshot below. If your data already contains a unique identifier or if you do not need to update the variants, you can safely skip this step.
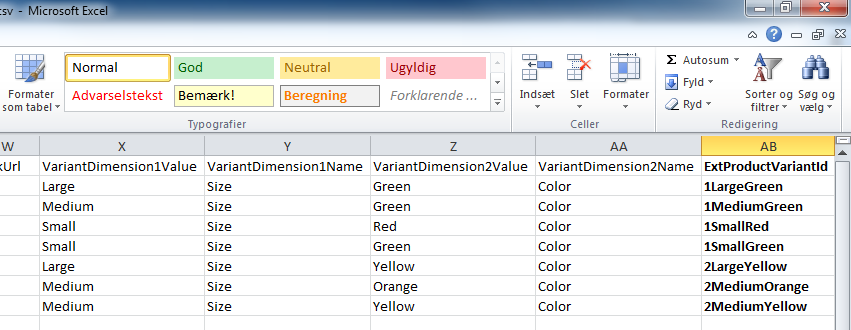
Adding unique identifiers to product variants.
To create a product or a product variant, you really only need a product ID and a name but the eSeller Cloud import wizard supports many other product properties.
The following properties are supported. Note that only the External product ID is required – the others are optional.
| ExtProductID | The product ID. Used as unique key | Text (Required) |
| ExtProductVariantID | Product variant ID, useful if variants need to be updated via import | Text (Inclusion recommended) |
| ProductName | | Text |
| VariantName | | Text |
| IsStockBound | If true (1), only variants with positive nonzero stock levels will be shown in the shop | Boolean |
| IsVisibleInShop | Determines if the product is shown in the shop | Boolean |
| VariantIsVisibleInShop | Determines if the variant is shown in the shop | Boolean |
| ProductListprice | | Number |
| ProductPreviousSalesprice | | Number |
| ProductSalesprice | | Number |
| VariantListprice | | Number |
| VariantPreviousSalesprice | | Number |
| VariantSalesprice | | Number |
| DiscountGroupId | References a discount group | Text |
| VatProductGroupID | References a Vat product group | Text |
| ProductGrossweight | | Number |
| VariantStocklevel | Stock level | Number |
| SalesBundleSize | | Number |
| SmallestSalesUnit | | Number |
| ManufactureId | References a manufacturer | Text |
| InStockMessage | Inventory status shown when variant is in stock | Text |
| NotInStockMessage | Inventory status shown when variant is not in stock | Text |
| NotStockBoundMessage | Inventory status shown when the inventory status is unknown | Text |
| SeoHtmlTitle | Page title | Text |
| SeoMetaDescription | Meta description | Text |
| SeoMetaKeywords | Meta Keywords | Text |
| VariantDimensionName1 | Name of the first variant dimension (eg. “Size”) | Text |
| VariantDimensionValueCode1 | ID of dimension | Text |
| VariantDimensionValue1 | Value of first variant dimension (eg. “Large” or “44”) | Text |
| VariantDimensionName2 | Name of the first variant dimension (eg. “Size”) | Text |
| VariantDimensionValueCode2 | ID of dimension | Text |
| VariantDimensionValue2 | Value of first variant dimension (eg. “Large” or “44”) | Text |
| VariantDimensionName3 | Name of the first variant dimension (eg. “Size”) | Text |
| VariantDimensionValueCode3 | ID of dimension | Text |
| VariantDimensionValue3 | Value of first variant dimension (eg. “Large” or “44”) | Text |
| VariantDimensionName4 | Name of the first variant dimension (eg. “Size”) | Text |
| VariantDimensionValueCode4 | ID of dimension | Text |
| VariantDimensionValue4 | Value of first variant dimension (eg. “Large” or “44”) | Text |
| VariantDimensionName5 | Name of the first variant dimension (eg. “Size”) | Text |
| VariantDimensionValueCode5 | ID of dimension | Text |
| VariantDimensionValue5 | Value of first variant dimension (eg. “Large” or “44”) | Text |
| VariantDimensionName6 | Name of the first variant dimension (eg. “Size”) | Text |
| VariantDimensionValueCode6 | ID of dimension | Text |
| VariantDimensionValue6 | Value of first variant dimension (eg. “Large” or “44”) | Text |
At this point we’re ready to import the variants. Navigate to Home > Integration > Import/Export > Import guide.
Once past the welcome screen of the wizard, click “Choose file” and browse for the correct CSV file. Once the correct file has been selected you are able to verify the filename and size. Click “Upload file” and then “Next >>”

Selecting a data file
The next screen (the third step) allows you to preview and tweak the way data is read from the file. Using the example CSV file it is important to select “Semicolon” (common in many European countries) as delimiter. Furthermore, since our example file contains a column header, it is important to check the “First row is heading” checkbox.
While adapting the settings to match the file format, it is possible to see the effect of any changes in the table situated in the bottom of the screen. Click “Next >>” once the correct data format has been set.
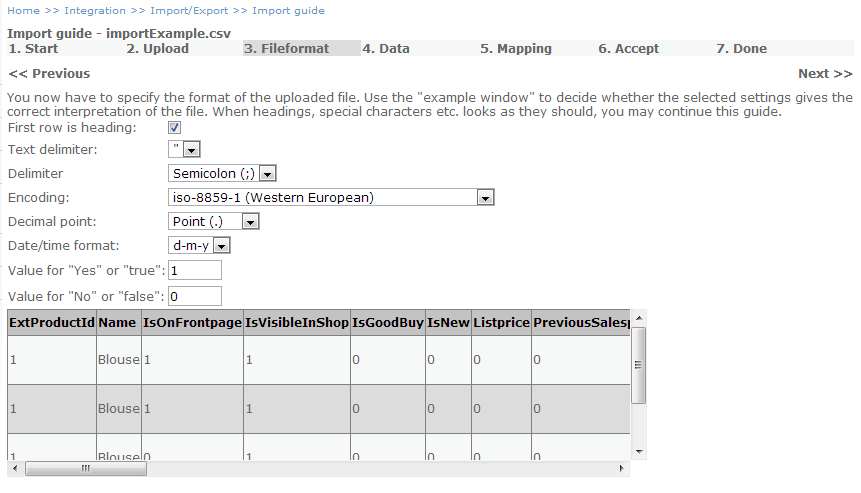
Setting the import file format.
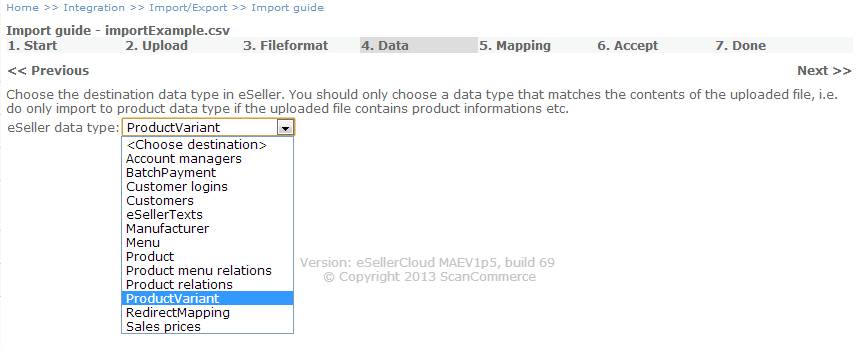
The next order of business is to select the entity type that we’re importing. In this case we are importing Product Variants so we select the “ProductVariant” option from the list of available entities. Click Next >> to map the data.
Mapping columns to fields
We’re almost done; all we need is to map the columns of the CSV file to the fields available in eSeller Cloud. It’s not necessary to map all fields so you can just map the ones you need and leave the remainder as is; - it is however very important to map External Product ID or External Product Variant ID. If these columns are not mapped, you will be unable to update data by import at a later stage. If you are updating data and one of the two External Product ID columns is not set, eSeller Cloud will create new products instead of updating the relevant existing products.
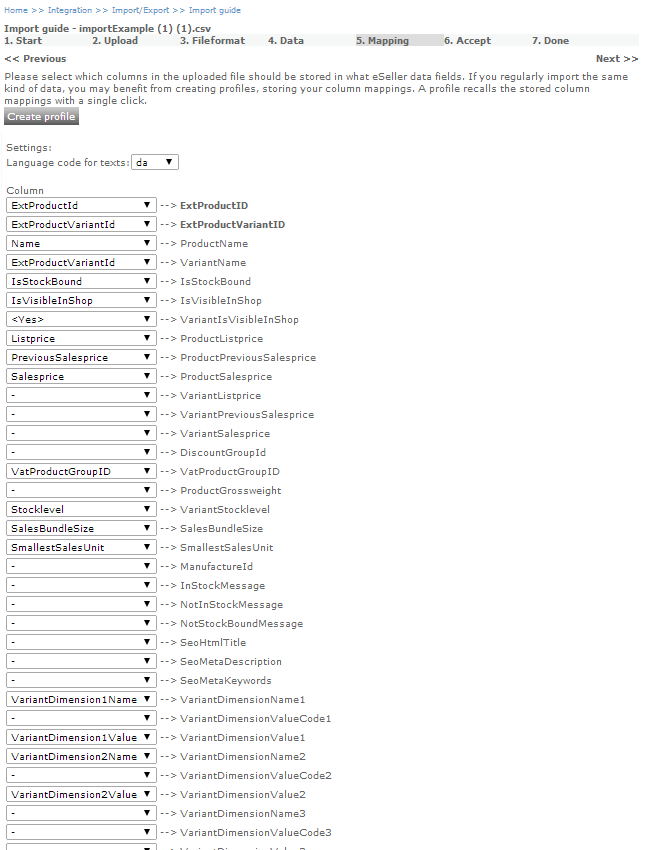
Mapping columns to eSeller
If you plan to update products by importing data, you can save the field mapping, this makes it both easier and faster to upload again. To save the field mapping, click the Create Profile button and name the profile appropriately.
When the mapping is complete, click Next >>.
This, the sixth and penultimate step, informs you that the import is ready and that changes cannot be undone. If you agree and if you are ready to proceed, click Accept >> to finalize the import. Once you click Accept the import may run for several minutes. Do not use your browser while the import runs as this may have adverse effects on the data.
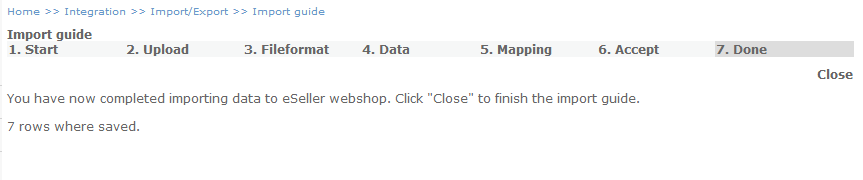
Import completed
Once the import has completed you will be able to see the number of entities that was updated.
Verify the validity of the imported data by navigating to Home > Stock > Product editing > Product list
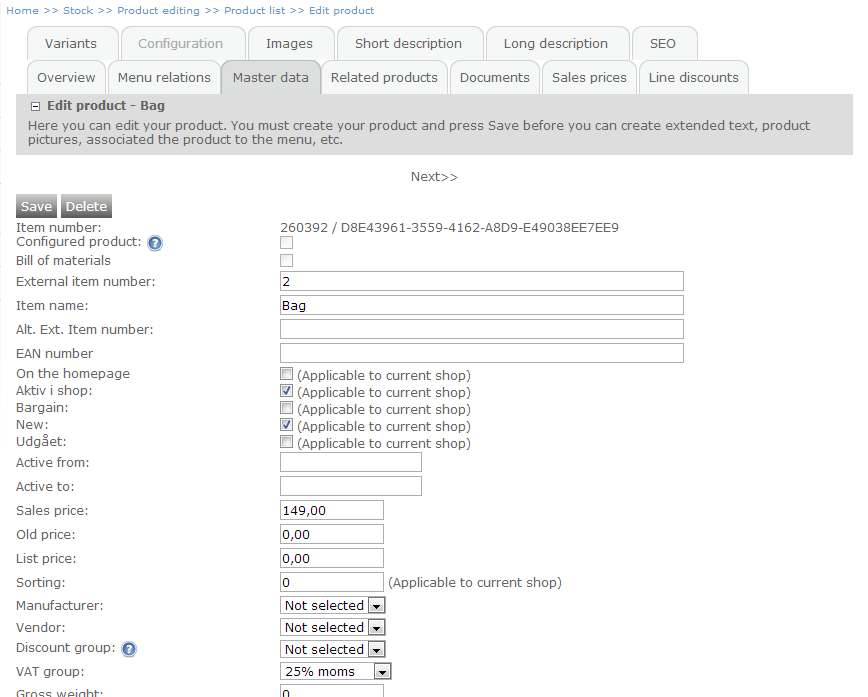
Imported product
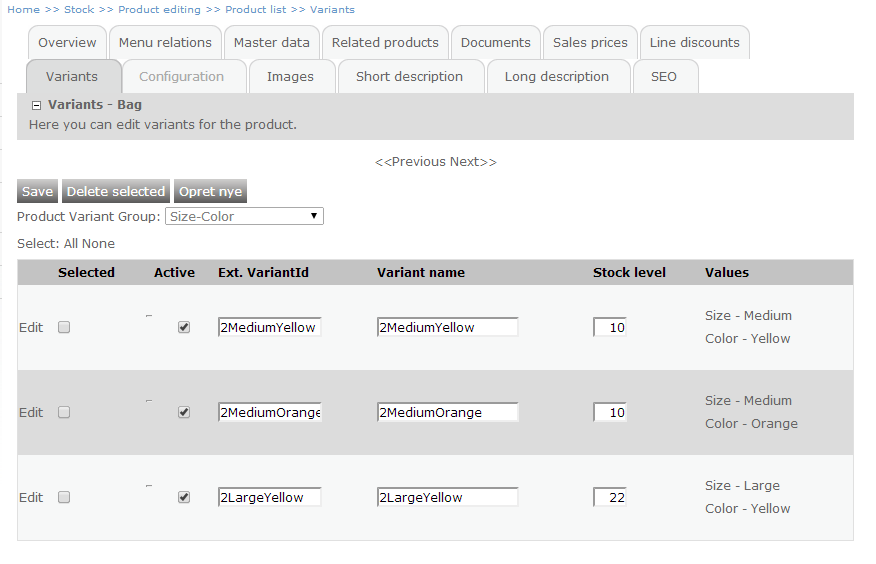
Imported variant configuration
In this tutorial, we have created variant based products in a web shop by importing a CSV file. The system has created the non-existent products and variants and associated variant dimensions.
You can use the Import wizard to quickly import new products or to update properties such as inventory status or price on already existing products or variants.