Here we will take you through step by step how you create a new product menu, when your product does not suit any of your existing product menus.
Navigate to Design > Menus > Product menu
In order to create a new relation press “Create new”. There are a number of text fields to fill in when you create a new relation.
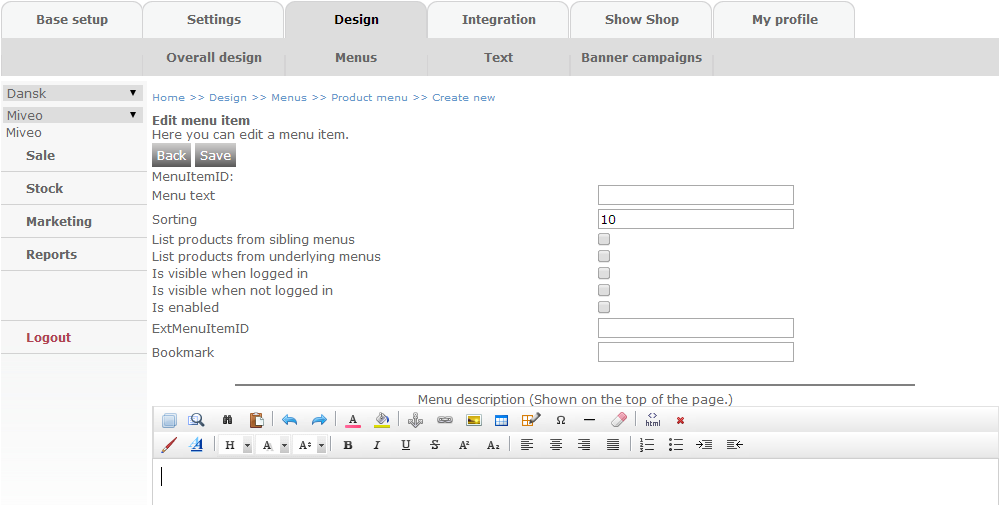
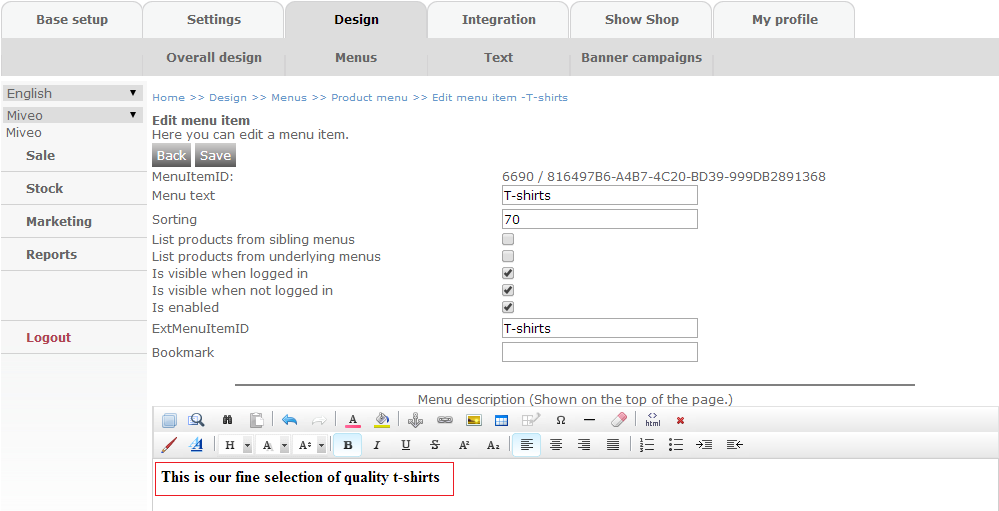
MenuItemID: any item in you webshop is given an ID, this is the menu’s ID. This is automatically given to the product.
ExtMenuItemID: you can choose to create an external menu item an ID. If you do not enter an external menu item ID, the system will automatically create an ID for the item.
Menu text: this is the name of the menu, under which the product belongs i.e. sale, men or shoes.
Sorting: here you can choose the order in which your sibling menus are to be shown. I.e. do you want t-shirts shown before shirts?
List product from sibling menus: sibling menus are menus at the same level. I.e. t-shirts and shirts are at the same level, therefore they are siblings. They can both be put under a parent menu such as Men’s Clothing. When ticked off, products from sibling menus are shown under a menu i.e. t-shirts and shirts. If you have a menu called show all men’s clothes, then products from sibling menus will be shown.
List product from underlying menus: when ticked off products from underlying menus are shown i.e. t-shirts and shirts are under the menu Men.
Is visible when logged in: when ticked off; your customers must be logged in to the webshop in order to see the menu. When NOT ticked off; it is not possible to see the menu, unless you are a customer with a login.
Note: to make sure your menu is visible for your customers when logged in, remember to tick off the box.
Is visible when not logged in: when ticked off; the menu is visible when you are not logged in. When NOT ticked off; the menu is not visible when you are logged in.
Note: to make sure your menu is visible for your customers remember to tick off the box.
Is enabled: when NOT ticked off; a given menu is NOT visible in the webshop. When ticked off; the menu is visible.
Note: to make sure the menu is visible to your customers in the webshop, remember to tick off the box.
Bookmark: if you choose to make use of a bookmark, it gives you the possibility of referring to a page at any time, when administrating your webshop.
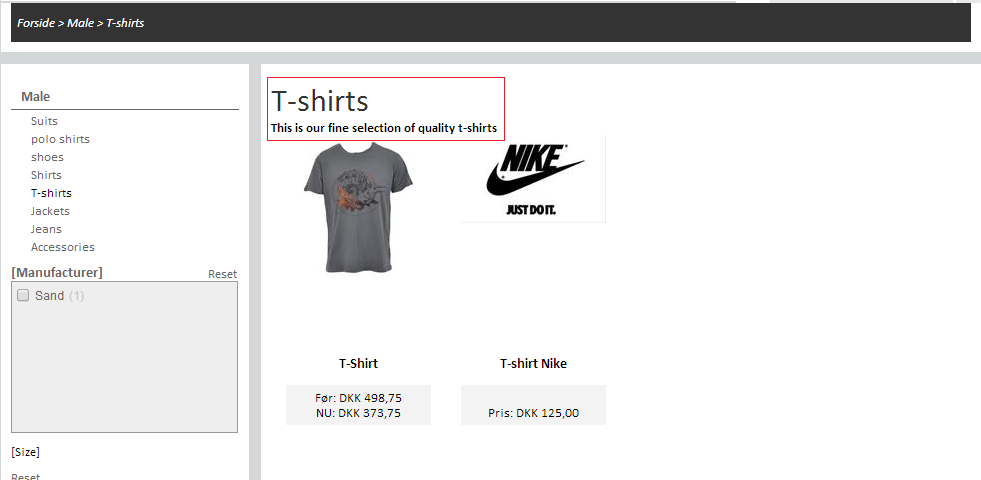
Menu description: here you can write a description of the menu under one of the submenus. Depending on the design of the webshop, it is possible to have the text shown at the top of the product menu in the webshop.
Here you have the possibility of optimizing your product in search engines in order to reach a higher place/rank.
Click “Save” at the top of the page.
Now you are able to view your product in the webshop. To do so, click on Show Shop. A new browser window opens and you have access to see your product and the different features in the webshop.
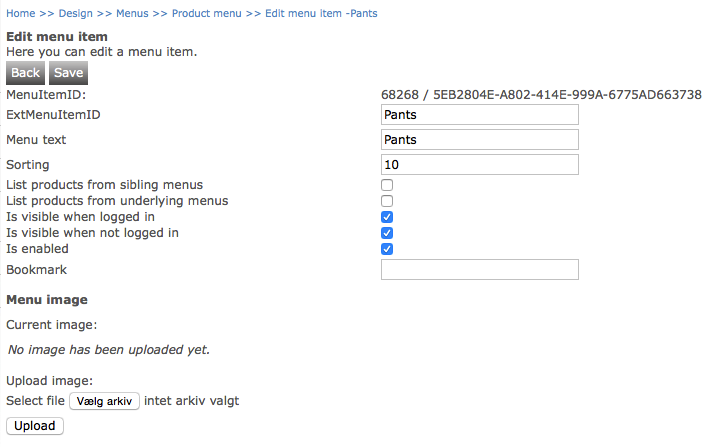
Adding images to product menus
Once a product menu is created, it is possible to add an image to the menu.
Displaying product menus with images
Product menus can be displayed with images by using the ShopMenu content control. The content control can be added to any design (e.g. a shop element or content element) in the shop.
Add the following code to the desired design:
<eSeller:Control ControlType="ShopMenu" ControlID="ProductMenu" MenuType="Product" MenuID="" EmptyProductMenues="Link" Depth="All" CssClass="ProductMenu" Mode="Image" Src="src" />
This code will display the complete product menu tree structure, but changing the values of the attributes can tailor the control to suit your needs.
| Attribute name | Description | Value |
|---|
| ControlType | The type of control | ShopMenu |
| ControlID | Any string of characters | E.g. ProductMenu |
| MenuType | Specifies which type of menu to render. Bookmark and Current menu has special meaning:
- Specifying "Current" means "using current menu as starting point, i.e. render children for this menu. The actual menu type is derived from the current navigationmap / eSellerTreeItem type. As the MenuID parameter is implicitly set to the ID of the menu, this parameter must be left blank or omitted. If specified, the shop yields an error.
- Using a Bookmark means, that the "MenuID" specifies what bookmark to look for, implicitly dictating the type of menu to traverse | Accepts the values "Product", "InfoMenu1", "InfoMenu2", "InfoMenu3", "InfoMenu4", "Bookmark" or "Current" |
| MenuID | When specified, only children of the specified menu are rendered.If the MenuID attribute is not specified or if it is empty (MenuID=""), all top-level menus and their children will be rendered. Only product menus currently have Ext. ID, why this option initially is only supported for product menus (and not info menus). | The Ext. ID of the product menu or the bookmark name (if MenuType="Bookmark" is selected) |
| EmptyProductMenues | Enumeration option to configure how to render product menus that contains no products.
| Values "Link" and "Hidden" are supported. |
| Depth | Controls how how deep the menu tree should be. Default is "all", meaning the entire tree is rendered.
Specifying "1" means "only this level (top level or if MenuID is specified, or immediate children to speficied MenuID).
Specifying "2" means immediate children and immediate childrens children. | Allowed values: "All", "1" or "2" |
| Mode | Defines whether menu elements should render as text only (Text) or text with Images (Image). | Allowed values: "Text" or "Image" |
| NotInheritImage | If this attribute is specified, children menu items without images will not inherit images from parent menus. It the attribute is not specified, images are inherited; If a menu item does not have an image, it will be taken from closest parent (or grandparent etc.)
| empty string (NotInheritImage="") |
| SrcType | Defines the attribute name of the generated <img> element. If SrcType is "data-src", the "data-src" attribute is used in the img element. If SrcType is "src", the attribute name will be "src". This attribute is OPTIONAL, and that the default value is "src". | Allowed values: "src" or "data-src" |
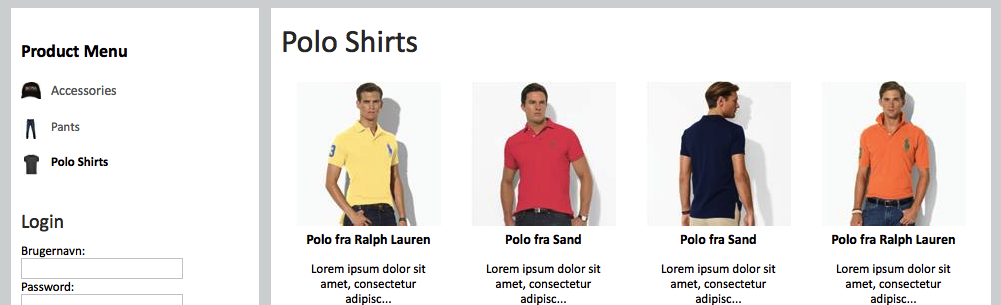
Below is an example of what the product menu might look like in the shop.
Integrated shops and product menu descriptions
For integrated shops that import product menus via FTP as a data origin special rules apply for product menu descriptions. Normally data is locked (owned) by the data origin and cannot be altered from other data origins (e.g. the shop administration), however this is not the case for product menu descriptions. The reason for this is, that usually the CMS editor in the shop administrator is a nicer interface for creating and maintaining product menu descriptions than the ERP system.
When a shop is integrated using a data origin the following behaviour must be observed to avoid accidentally overwriting/deleting product menu descriptions:
* If a menu is imported and the <language> element is omitted like so:
<menu id="menu1" lifeTimeId="menu1">
    <enabled>1</enabled>
    <uiSortOrder>10</uiSortOrder>
    <parentId></parentId>
</menu>
- The shop will delete all menu descriptions (including menu name/text) of the menu.
* If a menu is imported and elements within the <language> element are omitted like so:
<menu id="menu1" lifeTimeId="menu1">
    <enabled>1</enabled>
    <uiSortOrder>10</uiSortOrder>
    <parentId></parentId>
    <language>
        <languageId>DAN</languageId>
        <name>menu1</name>
    </language>
- Any descriptions on the menu are not altered or deleted - they are left untouched. If you wish to maintain product menu descriptions in the shop administration whilst the shop is integrated via a data origin, you should use this strategy for importing/updating menus via FTP import.
* If a menu is imported with the <language> element present and the elements empty like so:
<menu id="menu1" lifeTimeId="menu1">
    <enabled>1</enabled>
    <uiSortOrder>10</uiSortOrder>
    <parentId></parentId>
    <language>
        <languageId>DAN</languageId>
        <name>menu1</name>
        <description></description>
        <metaKeywords></metaKeywords>
        <metaDescription></metaDescription>
        <htmlTitle></htmlTitle>
    </language>
</menu>
- The product menu descriptions will be deleted - even if they have been created in the shop administration.
* If a menu is imported with the <language> element and the description elements are filled like so:
<menu id="menu1" lifeTimeId="menu1">
    <enabled>1</enabled>
    <uiSortOrder>10</uiSortOrder>
    <parentId></parentId>
    <language>
        <languageId>DAN</languageId>
        <name>menu1</name>
        <description>menuDescription1</description>
        <metaKeywords>menuMetaKeywords1</metaKeywords>
        <metaDescription>menuMetaDescription1</metaDescription>
        <htmlTitle>menuHtmlTitle1</htmlTitle>
    </language>
</menu>
- Any existing product menu descriptions are overwritten with what is specified in the imported file.
Due to the risk of accidentally overwriting product menu descriptions when product menus are imported via data origin integration, we strongly suggest that backups are made of the product menu descriptions. You can use the Export wizard in the shop administration to export product menus (and their descriptions) as CSV or XML