In this tutorial we cover the steps of how to transform an Excel file to an XML file ready for import to eSeller Cloud – e.g. product data, menus, SEO descriptions etc. This is especially useful in situations where a webshop is moved from another platform to eSeller Cloud, getting data into the shop before the automatic integration is set up or otherwise creating or updating large quantities of data which is maintained in an Excel spreadsheet.
The following steps are required:
- 1 - Create an XML template
- 2 - Use the XML Mapping functionality in Excel to map the columns in the spreadsheet with the elements in the XML template
- 3 - Export the file as an XML file
- 4 - Verify that the new transformed file is correct and upload it to eSeller Cloud via the FTP.
Creating the XML template
Create a template for the XML file containing the elements and structure that you wish to end up with. The template must conform to the eSeller Cloud XML import schema – see the schema documentation here. Excel uses this file as a schema for generating the transformed XML file. Below you see an example of such a template XML file:
<integrationData>
	<products>
		<product id="">
			<shopGroup>
				<shopGroupId></shopGroupId>
				<language>
					<languageId></languageId>
					<shortDescription></shortDescription>
					<longDescription></longDescription>
					<metaKeywords></metaKeywords>
					<metaDescription></metaDescription>
				</language>
			</shopGroup>
		</product>
	</products>
</integrationData>
Observe that the <product> segment of the file exists twice in the template – this is necessary in order for Excel to properly use the file as a schema.
In this example we will transform an Excel file containing long and short descriptions as well as SEO descriptions for products.
Using the XML Mapping functionality
Open your .xlsx file in Excel – ensure that the Developer tab is enabled (or enable this, if it is not already) and that the columns in your spreadsheet follow the order of the elements in the XML template.
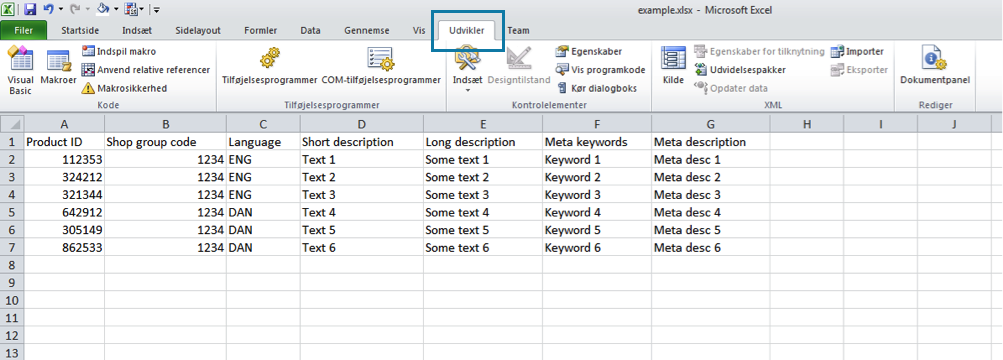
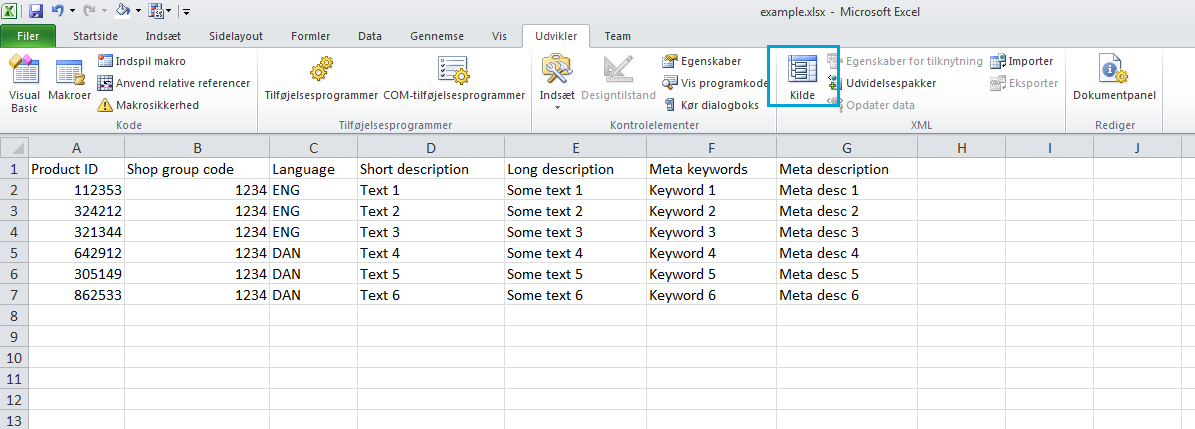
Select the Developer tab and click “Source”.
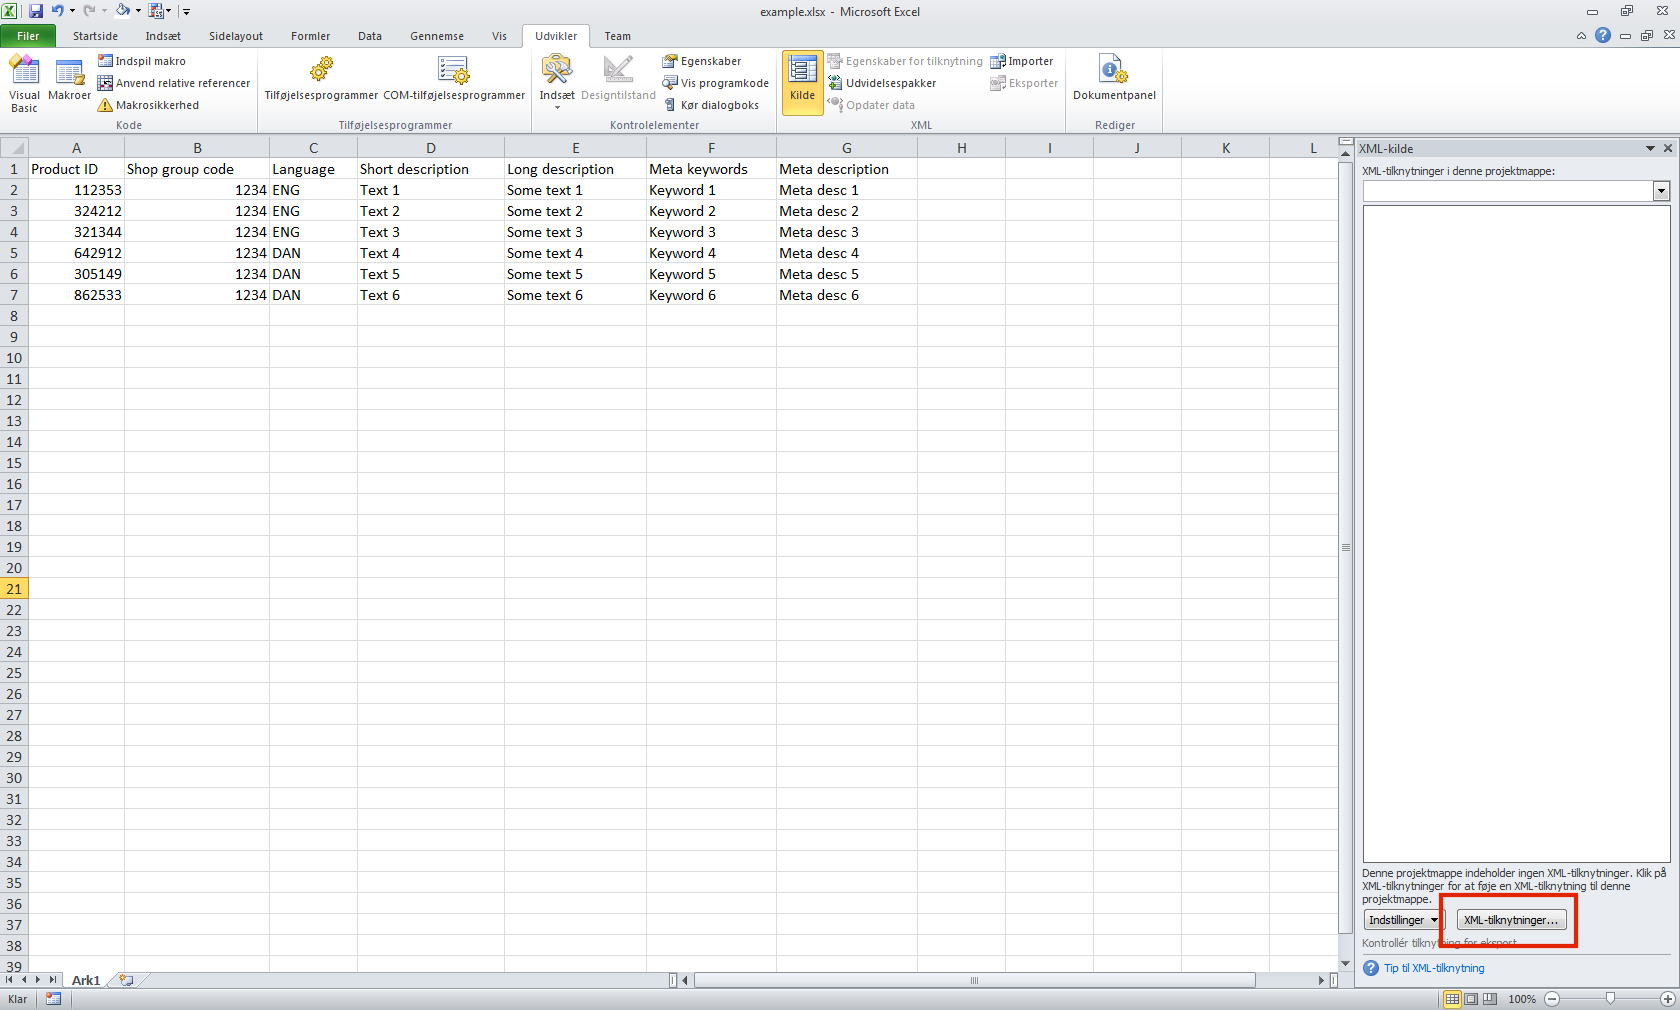
Click the “XML Maps…” button in the new XML Source pane and add your XML template.
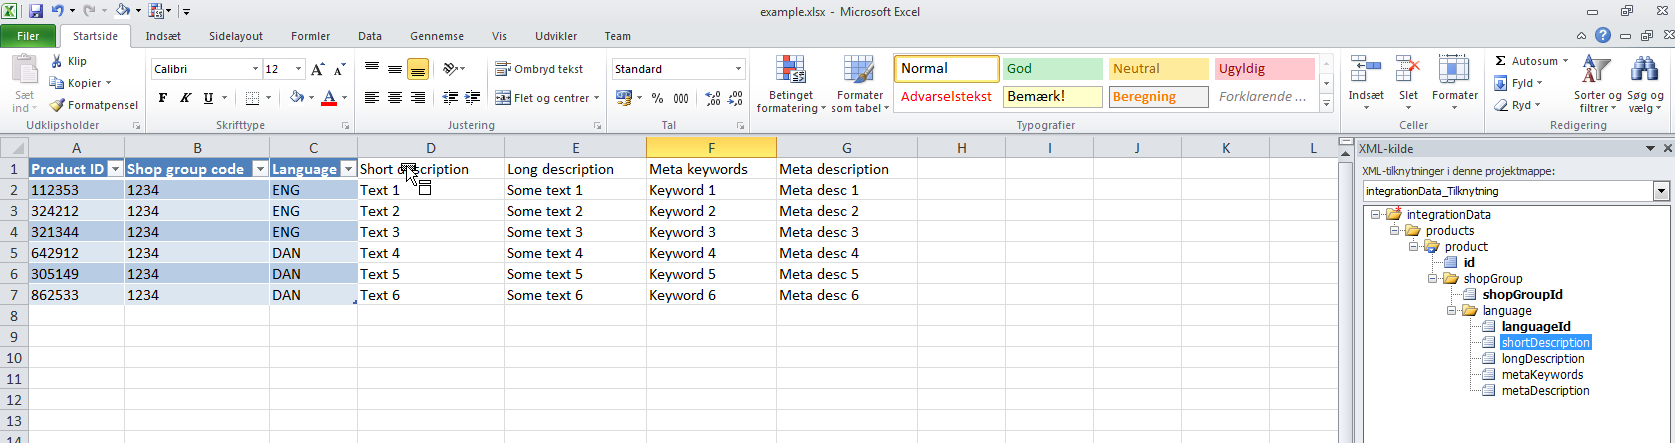
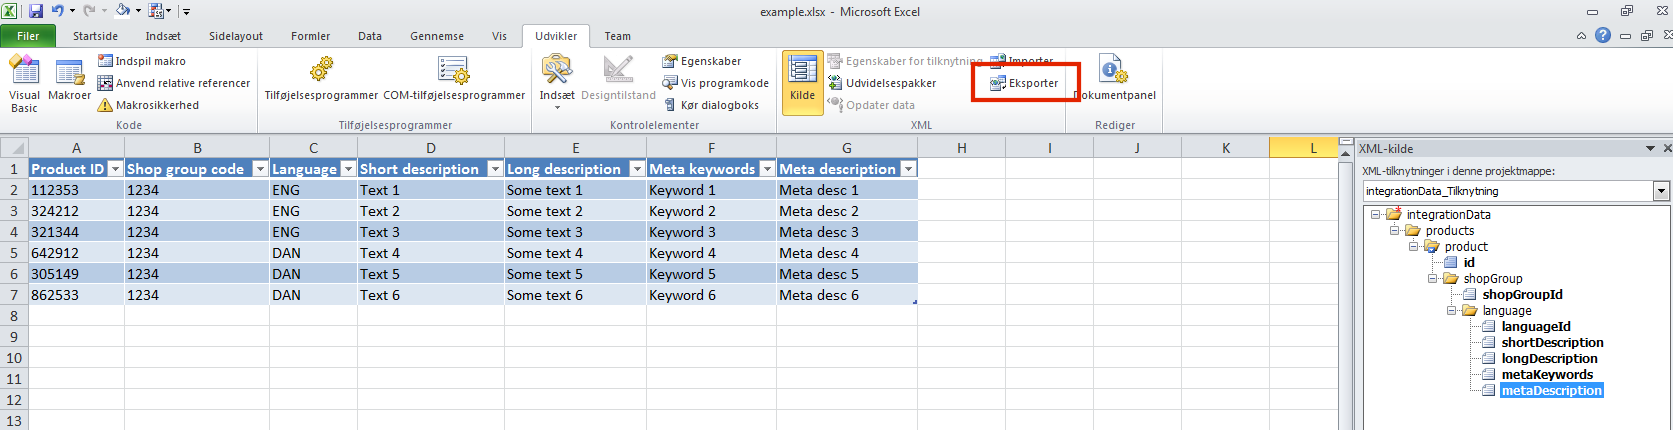
Create the mapping from the XML structure to the data columns by dragging the elements from the XML Source pane to the column headers in the spreadsheet.
Exporting the file as XML
Use the “Export” functionality under the Developer tab to export the file as XML.
Verify and upload
Open your new XML file and verify that data is correct – now you are ready to import the file to eSeller Cloud via FTP.
<?xml version="1.0" encoding="UTF-8" standalone="yes"?>
<integrationData xmlns:xsi="http://www.w3.org/2001/XMLSchema-instance">
	<products>
		<product id="112353">
			<shopGroup>
				<shopGroupId>1234</shopGroupId>
				<language>
					<languageId>ENG</languageId>
					<shortDescription>Text 1</shortDescription>
					<longDescription>Some text 1</longDescription>
					<metaKeywords>Keyword 1</metaKeywords>
					<metaDescription>Meta desc 1</metaDescription>
				</language>
			</shopGroup>
		</product>
		<product id="324212">
			<shopGroup>
				<shopGroupId>1234</shopGroupId>
				<language>
					<languageId>ENG</languageId>
					<shortDescription>Text 2</shortDescription>
					<longDescription>Some text 2</longDescription>
					<metaKeywords>Keyword 2</metaKeywords>
					<metaDescription>Meta desc 2</metaDescription>
				</language>
			</shopGroup>
		</product>
		<product id="321344">
			<shopGroup>
				<shopGroupId>1234</shopGroupId>
				<language>
					<languageId>ENG</languageId>
					<shortDescription>Text 3</shortDescription>
					<longDescription>Some text 3</longDescription>
					<metaKeywords>Keyword 3</metaKeywords>
					<metaDescription>Meta desc 3</metaDescription>
				</language>
			</shopGroup>
		</product>
		<product id="642912">
			<shopGroup>
				<shopGroupId>1234</shopGroupId>
				<language>
					<languageId>DAN</languageId>
					<shortDescription>Text 4</shortDescription>
					<longDescription>Some text 4</longDescription>
					<metaKeywords>Keyword 4</metaKeywords>
					<metaDescription>Meta desc 4</metaDescription>
				</language>
			</shopGroup>
		</product>
		<product id="305149">
			<shopGroup>
				<shopGroupId>1234</shopGroupId>
				<language>
					<languageId>DAN</languageId>
					<shortDescription>Text 5</shortDescription>
					<longDescription>Some text 5</longDescription>
					<metaKeywords>Keyword 5</metaKeywords>
					<metaDescription>Meta desc 5</metaDescription>
				</language>
			</shopGroup>
		</product>
		<product id="862533">
			<shopGroup>
				<shopGroupId>1234</shopGroupId>
				<language>
					<languageId>DAN</languageId>
					<shortDescription>Text 6</shortDescription>
					<longDescription>Some text 6</longDescription>
					<metaKeywords>Keyword 6</metaKeywords>
					<metaDescription>Meta desc 6</metaDescription>
				</language>
			</shopGroup>
		</product>
	</products>
</integrationData>