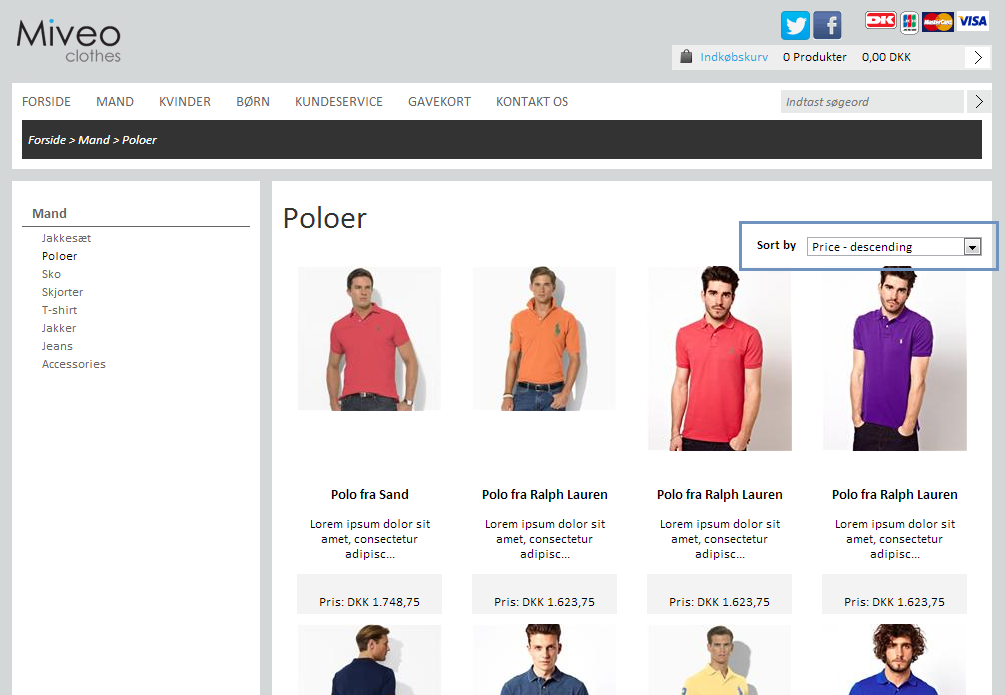
Product sorting enables your customers to influence the order in which products appear in a product list according to different parameters such as product price, name and product number. Typical use cases are enabling customers to sort products according to price; from high to low and vice versa.

Setting up product sorting is done in three easy steps:
-
Selecting product sorting parameters
-
Configuring the product sorting element
-
Styling the product sorting element.
Product sorting functionality is created by adding a product sorting element above or below (or both above and below) a product list. The element is typically seen in shape of a drop-down list containing the different available sorting options.
In order to set up product sorting on your webshop, go to Stock > Product Sorting.
1. Selecting product sorting parameters
First, you have to select what product sorting parameters your customers should be able to sort product lists by.

The product sorting parameters are based on data readily available from the products, namely sales price, product name, product number as well as by the sort order set on the product card.
The sorting parameters checked will be the ones displayed as product sorting options in the sorting element.
2. Configuring the product sorting element
Next, you have to set up the product sorting element by clicking the “Manage product sorting element” button.

Here, you are able to select element placement, display style and default sorting parameter.
1. Select where the product sorting element should appear: Above, below or both above and below the product list.
2. Product sorting element display style: Select the display style that best suits the design of your webshop (Currently only a drop-down list is available). You are also able to specify any text that should appear in conjunction with the sorting element.
3. Select which product sorting parameter should be selected by default when a customer enters a product menu with a product list in your webshop.
Click “Save”
3. Adding styling to the product sorting element
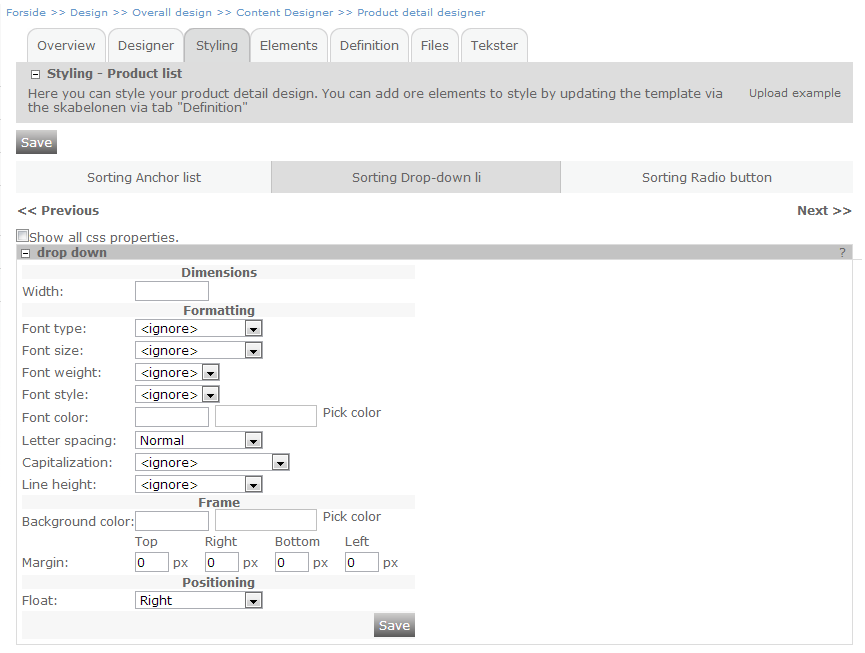
You are able to add styling to your product sorting element either by accessing the Product list content design “Styling” tab or by uploading a CSS document to the Product list “Files” tab. You are able to navigate to the Product list content design by clicking the “Product sorting element styling” button in the third step of the Product sorting setup.

Defining texts and translations
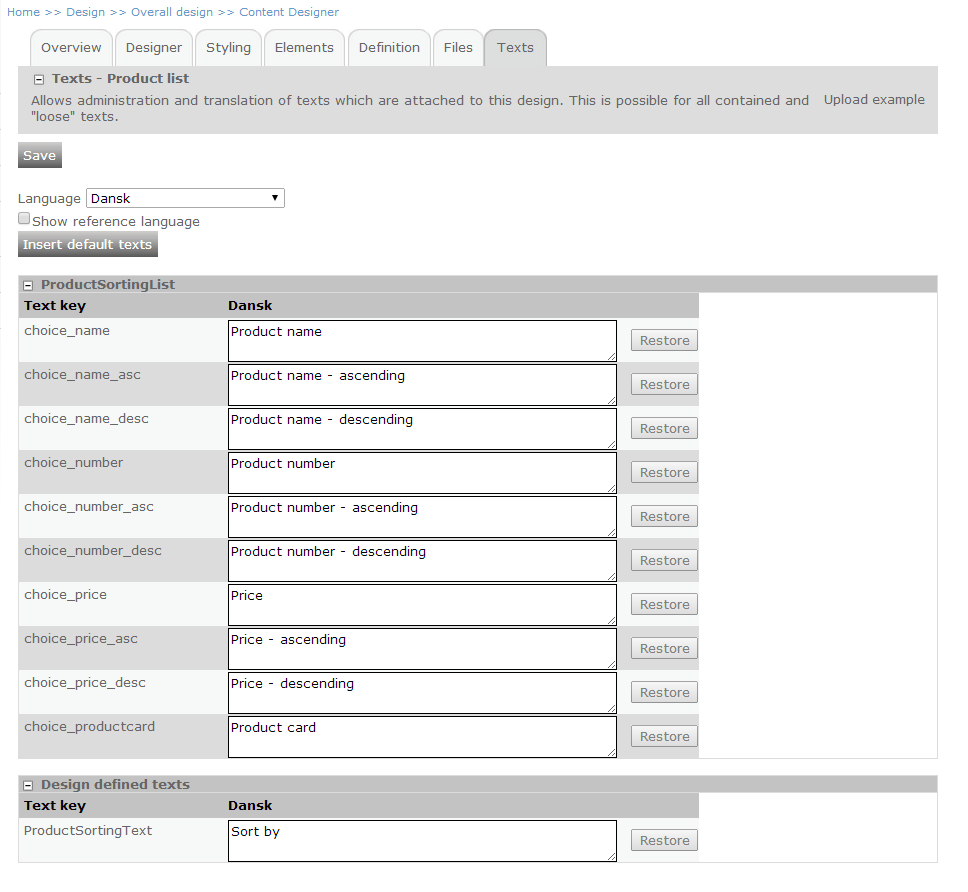
You are able to specify the texts that should be displayed as the sorting parameters in the product sorting element. Moreover, you are able to define translations for the different languages in your shop (if any). Changing the text values of the product sorting parameters is done in the product sorting element just as with styling. Navigate to the Texts tab.

Expand the "ProductSortingList" element - a list of text keys appear along with the text values associated with them. You are able to change the texts simply by editing the text in the input field and clicking "Save". If you wish to add a translation, you just select the desired language in the drop-down (please note that only languages active in your shop are available) and enter the translations in the text fields. Remember to click "Save".
You are also able to change the text that you might have added when creating the product sorting element - this is found when expanding the "Design defined texts" element and changing the text in the text field. Just as with the sorting parameter texts, you are able to create different translations for this text.
Behind the scenes
When a product sorting element is added to the shop, it is added to the definition of the Product list content design. Depending on the desired position, it is added either above, below or both above and below the product list content control.
The content control generating the product sorting element will vary according to what has been selected in the configuration of it.
An example of the content control generating a product sorting element is displayed below:
<eSeller:Control ControlType=”ProductSortingList” Controlid=”ProductSortingList” WorksOn=”ProductList” DefaultValue=”PriceDesc” DisplayStyle=”DropDown” />
This particular content control has the type “ProductSortingList” and generates a drop-down list that can sort products from a product list with the ID “ProductList”. The products in the product list will by default be ordered according to their price – from high to low (descending).
Adding a sorting element to the search result page
It is possible to add the product sorting element to the search result page, making it possible for your customers to order search results by for instance price or name. Simply add the control to the content design of your shop's search result page. Note that when using this element in conjunction with the search result page, it is required that the "DeafultValue" is set to "Relevancy" as illustrated below:
<eSeller:Control ControlType=”ProductSortingList” Controlid=”ProductSortingList” WorksOn=”ProductList” DefaultValue=”Relevancy” DisplayStyle=”DropDown” />
Content control attributes
Below is an overview of the content control and the possible attributes and values that apply to it.
| Attribute | Value | Description |
|---|
| ControlType | ProductSortingList | Defines the control type of the element |
| Controlid | String | Defines and ID for this element - must be unique to other controls with ControlType ProductSortingList |
| WorksOn | String | Specifies the Control ID of the target product list |
| DefaultValue | NumberAsc, NumberDesc, NameAsc, NameDesc, PriceAsc, PriceDesc, ProductCard, Relevancy* | Specifies which sorting option should be selected per default |
| DisplayStyle | DropDown | Specifies which HTML form type should be used |
* The Relevancy parameter is only applicable to product sorting elements added to the search result page.
Further feature development
Create customized product lists (for instance “Most popular”) and use them as product sorting parameters.