If your Webshop supports customer logins, it is important that you customers are able to retrieve their password if they forget their login credentials. Therefore, you are able to implement a secure solution for your customers to request a password change.
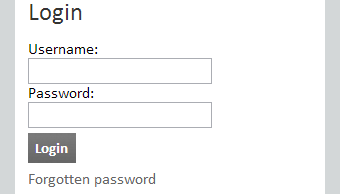
In order for this functionality to work, it is necessary that your Webshop already supports customer login. The password reminder functionality creates a “Forgotten password” link under the Login formulas in your Webshop (as shown below) that allows your customer to enter his e-mail address, after which he will receive an e-mail containing a link to a page where he is able to change his login password.
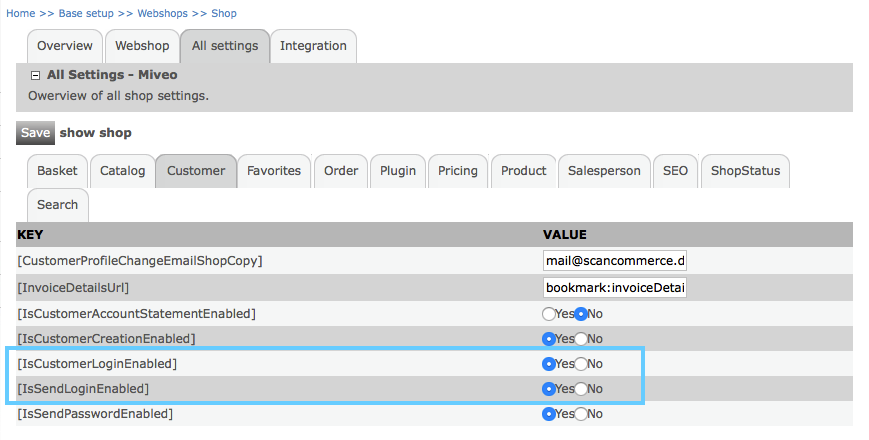
In order to add this functionality to your Webshop, you first have to ensure that it is enabled. Go to Base Setup > Webshops > Shop > [your webshop] > All settings tab > Customer tab
and make sure that [IsCustomerLoginEnabled] and [IsSendLoginEnabled] are enabled.
Click the “Save” button.
As mentioned, it is necessary that customer login is enabled on your Webshop. This means that a “Login box” element must be attached to a page design. In order to assure this, go to Design > Overall design > Page Designer > [The page layout where the Login box appears, for instance “All pages”] > Shop elements tab and select the container to which the Login box element is attached.
Make sure, that the Login box element appears under “Attached elements”. If it does not, you can attach it to the desired container by clicking “Add>>”.
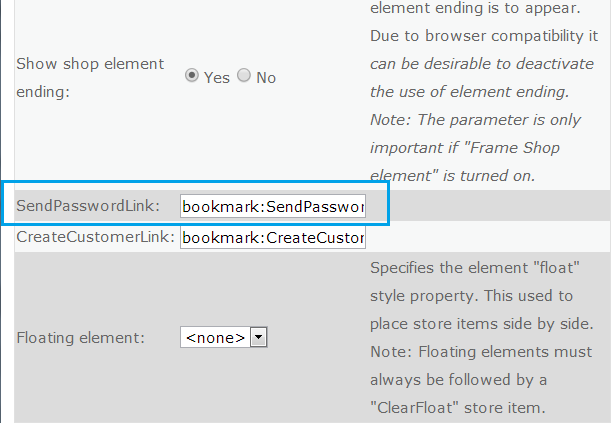
When/if the Login box element appears under “Attached elements”, click it. Now you are able to configure the element. Scroll to the “SendPasswordLink” input field and enter bookmark:SendPasswordLink.
Click the “Save” button.
Creating the SendLogin page
Now we need to add the appropriate page that will contain a text field and a button where the user is able to enter his e-mail thus receiving a password reset e-mail as shown below.

In order to do this go to Design > Overall design > Layout – Setup and scroll to “Customer pages”.
Click the “Add new” icon (highlighted by a red box in the image below).

You need to provide this new page with a few settings.
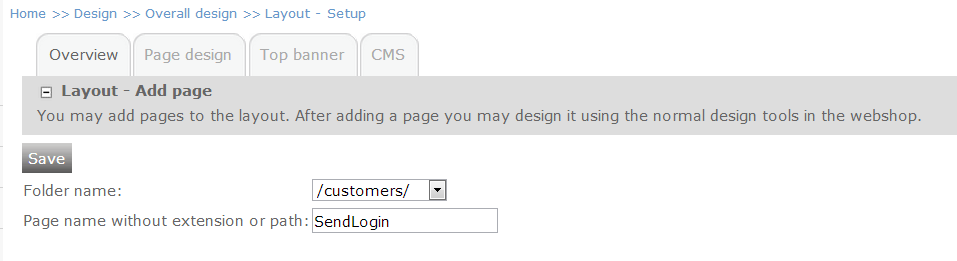
Select “/customers/” as the Folder name and give the page the name SendLogin
Click “Save”
Now, find your new page in the table. If you named it SendLogin, it will be called /customers/SendLogin.aspx

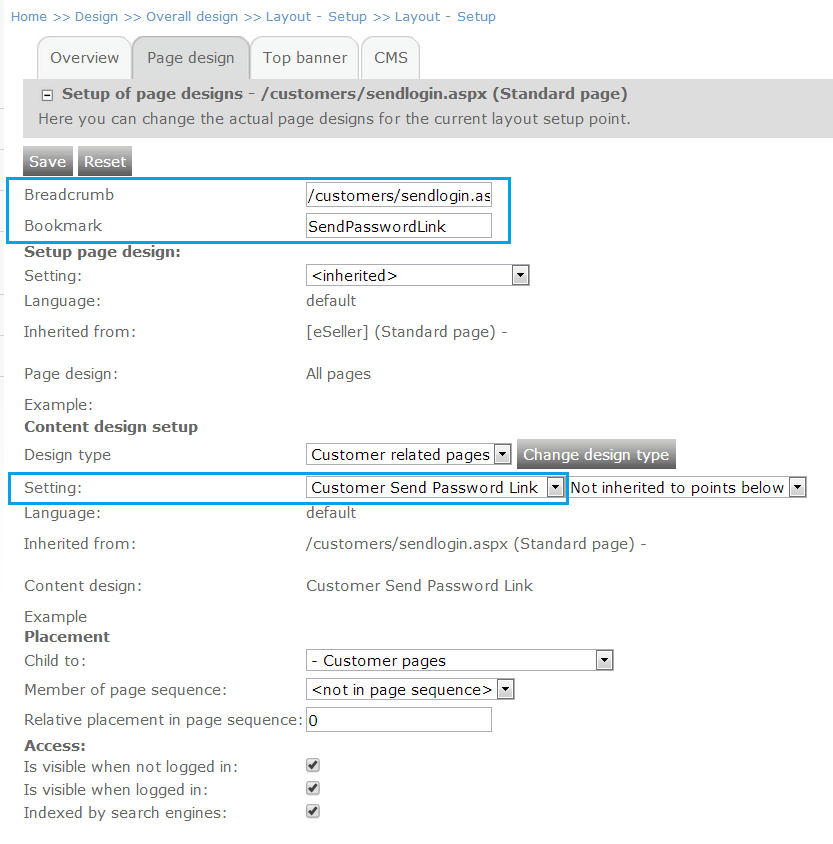
Click “Edit” (highlighted by a blue box above).
Here you are able to edit settings for this page design. You are able to change the name of the page (optional).
However, you must enter SendPasswordLink as the page bookmark. This way, the bookmark you set for the Login box element (bookmark:SendPasswordLink) will point to this page design.
Moreover, the “Setting” should be “Customer Send Password Link”.
Leave the rest of the settings as is.
Click “Save”.
In order to define the appropriate texts for this page, go to Design > Text > CMS texts
Here you see a CMS text with the Text ID "SendPassword". If you click it, you are able to define the text that will be displayed above the input field on the SendLogin page (when the customer has clicked the “forgotten password” link).
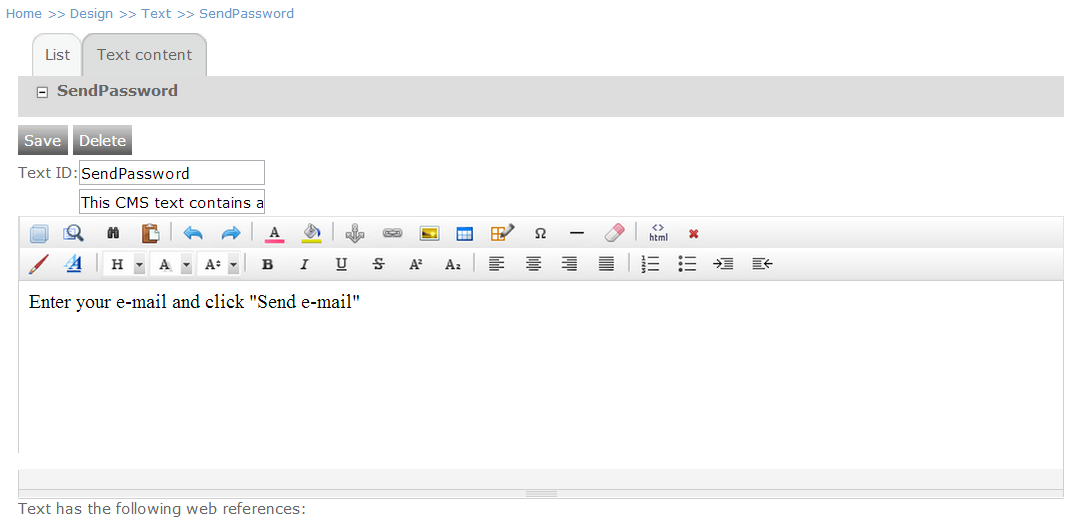
The text written in the CMS text above will be displayed on the SendLogin page as shown in the image below.
Defining content design
In this step we defined that the “Forgotten password” link under the customer login box will direct the customer to the “SendLogin.aspx” page that uses the content design “Customer Send Password Link”. Now we need to define the content that should be displayed on this page. This content is provided by the Content design.
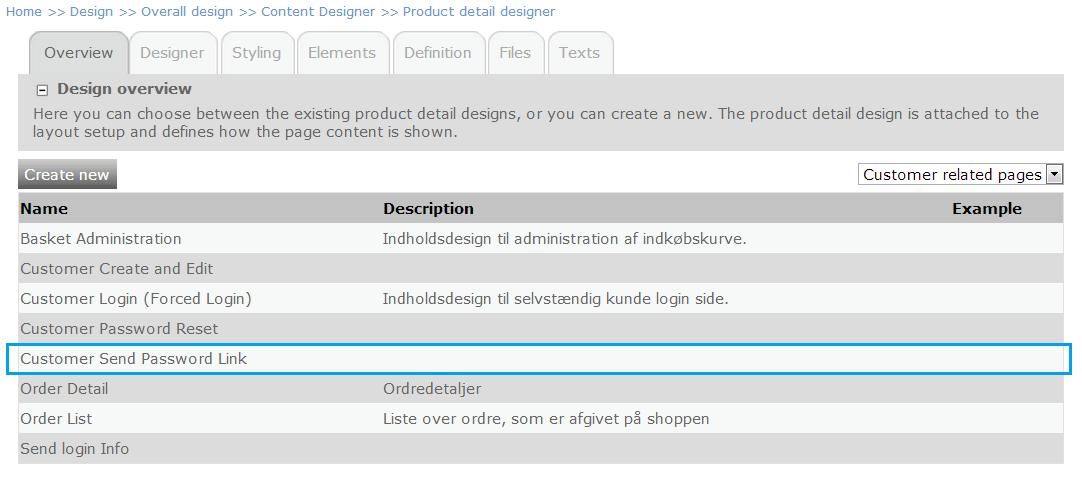
Go to Design > Overall design > Content Designer
and select “Customer related pages” in the dropdown to the right.
Click the “Customer Send Password Link” item in the list.
Click the “Definition” tab.
Here you are able to specify the content of this content design. The following code will result in this content:
The text written in the SendPassword CMS text (if empty, no text will appear). Moreover, the code creates an input field where the customer can enter his e-mail as well as a button for submitting the e-mail.
<eSeller:Css Name="Send Password Area" Selector=".sendPasswordArea" GroupName="Send Password" SelectorGroup="12" />
<eSeller:Css Name="Send Password Text" Selector=".sendPasswordText" GroupName="Send Password" SelectorGroup="12" />
<eSeller:Css Name="Send Password Input" Selector=".sendPasswordInput input" GroupName="Send Password" SelectorGroup="12" />
<eSeller:Css Name="Send Password Button Area" Selector=".sendPasswordButtonArea" GroupName="Send Password" SelectorGroup="12" />
<eSeller:Css Name="buttonSend" Selector=".sendPasswordReminder" GroupName="Send Password" SelectorGroup="11" />
<!--Creates an area that sourounds the Send password content-->
<div class="sendPasswordArea">
<!--Displays the value from a Cms text page-->
<div class="sendPasswordText">
<eSeller:Select Value-Of="CmsSpecialPages:Text("sendPassword")" />
</div>
<!--Displays the input field for the Send Password functionality-->
<div class="sendPasswordInput">
<eSeller:Control ControlType="CustomerLoginPasswordReminder" ControlID="Password Reminder" />
</div>
<div class="sendPasswordButtonArea">
<eSeller:Control ControlType="GenericButton" WorksOn="Password Reminder" ControlID="SubmitForgottenPassword" CssClass="sendPasswordReminder" />
</div>
</div>
Creating the PasswordReset page
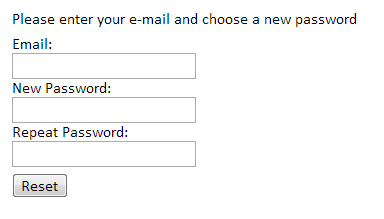
We still need to create the page that the customer will navigate to when he clicks the link in the password reset e-mail that he has received. The link should navigate to a page where the customer is able to enter his e-mail and define a new password for his user account as shown below. This process is somewhat the same as when we created the SendLogin page.
Go to Design > Overall design > Layout – Setup and scroll to the “Customer pages”.
Click the “Add new” icon to the far right.
Select /customers/ as the Folder name.
Name the page PasswordReset.
Click “Save"
Navigate to the newly created page /customers/PasswordReset.aspx and click “Edit”

Enter PasswordResetUrl as the Bookmark. This bookmark is used to create the appropriate URL (link) in the e-mail, navigating the customer to this page.
Select Customer Password Reset as the content design.
Click “Save”
In order for the e-mail link to navigate the customer to this page, go to Base setup > Webshop > Shop > [your webshop] > All settings tab > ShopStatus tab and enter bookmark:PasswordResetUrl in the [PasswordResetUrl] input field. This specifies that the [[RESTORE_URL]] in the password reset e-mail should navigate to the page with the bookmark PasswordResetUrl (which is the PasswordReset page we just created).
Click the “Save” button.

Just as before, we are able to specify any CMS text that should be displayed on this page. Go to Design > Text > CMS texts.
The CMS text with the Text ID "PasswordReset" contains the text displayed above the input fields on the page. If you do not specify any text, no text will appear above the input fields.
Defining content design
In order to define the content of the PasswordReset page, go to Design > Overall design > Content Designer
and select “Customer related pages” from the drop down.
Click “Customer Password Reset”
Click the “Definition” tab
The following code should appear as the content design definition:
<eSeller:Css Name="Reset Password Area" Selector=".resetPasswordArea" GroupName="Reset Password" SelectorGroup="12" />
<eSeller:Css Name="Reset Password Text" Selector=".resetPasswordText" GroupName="Reset Password" SelectorGroup="12" />
<eSeller:Css Name="Reset Password Input" Selector=".resetPasswordInput input" GroupName="Reset Password" SelectorGroup="12" />
<eSeller:Css Name="Reset Password Button Area" Selector=".resetPasswordButtonArea" GroupName="Reset Password" SelectorGroup="12" />
<eSeller:Css Name="buttonReset" Selector=".passwordReset" GroupName="Reset Password" SelectorGroup="11" />
<!--Creates an area that sourounds the Reset password content-->
<div class="resetPasswordArea">
<!--Displays the value from a Cms text page-->
<div class="resetPasswordText">
<eSeller:Select Value-Of="CmsSpecialPages:Text("PasswordReset")" />
</div>
<!--Displays the input fields for the Reset Password functionality-->
<div class="resetPasswordInput">
<eSeller:Control ControlType="CustomerLoginPasswordReset" ControlID="Password Reset" />
</div>
<div class="resetPasswordButtonArea">
<eSeller:Control ControlType="GenericButton" WorksOn="Password Reset" ControlID="SubmitPasswordReset" CssClass="passwordReset" />
</div>
</div>
The code displays the PasswordReset CMS text and creates the password reset fields as well as a button as shown below.
Specifying the password reset e-mail content
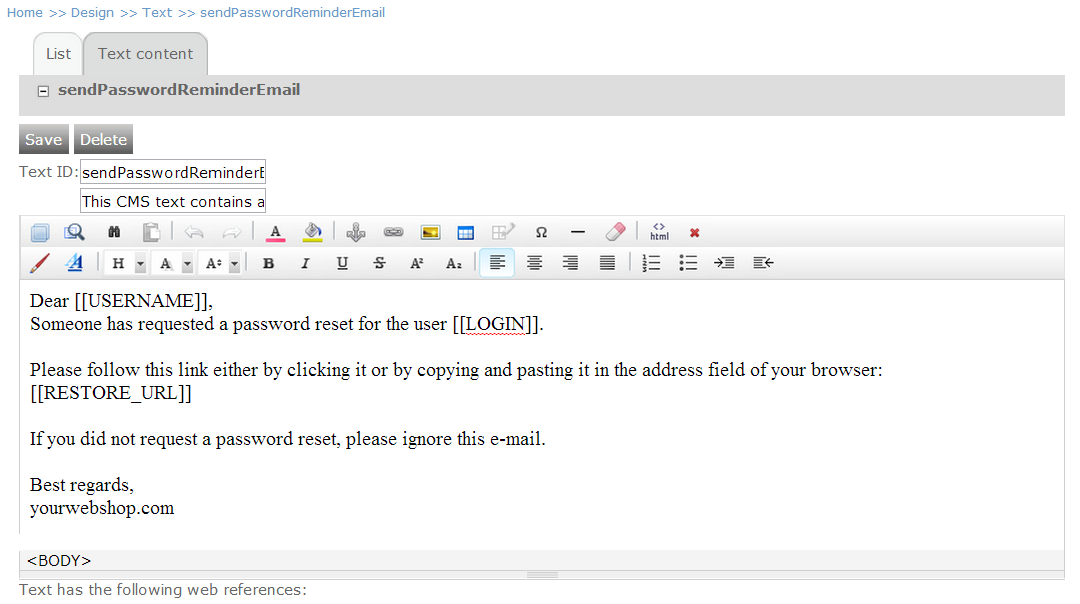
By using the CMS texts functionality you are able to specify the content of the e-mail that will be sent to the customer requesting a password reset (optional). If you do not specify anything, the customer will receive a default e-mail. This e-mail content is, once again, located in Design > Text > CMS texts and has the Text ID
"sendPasswordReminderEmail".
If you wish to define the content of the email sent to the customer, click the sendPassewordReminderEmail item in the list and write the text you want the customer to receive in the e-mail. You are able to use a few codes that enable you to make the e-mail more personal:
-
[[RESTORE_URL]]: This code displays the URL (link) that the customer must follow in order to reset his password. Please note that this code is required in order for this e-mail content to be used. If this code does not appear in the e-mail text, the system will disregard this content and send a default password reset e-mail. Due to security reasons this link has a time limited validity (three days), which means that if the customer clicks the link later than three days after having requested a password reset, the link will no longer work and the customer must make a new request in order to get a new link.
-
[[USERNAME]]: This code displays the name of the customer. If no name exists for the user, the text will say “Sir/Madam”.
-
[[LOGIN]]: This code displays the username of the user; this is what is used as the login username. It might be helpful to the user if this is apparent in the e-mail as he might have forgotten both his username and password.
-
[[ExtCustomerID]]: This code displays the external ID of the customer.
Below is an example of how a password reminder e-mail might look like:
Thus, the e-mail that the customer will receive will look like this:
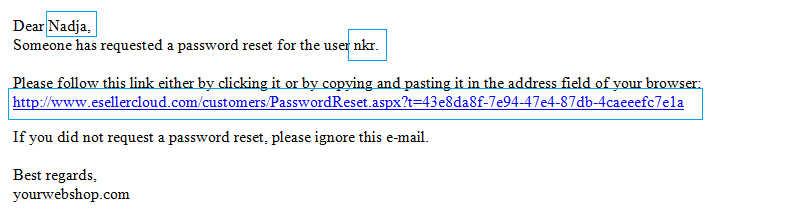
The blue boxes highlight where the proper texts are displayed instead of the codes.
You are able to format the text of the e-mail simply by using the text formatting controls of the CMS text.
Please note that this e-mail is language specific meaning that you will have to define an e-mail for each language used in your shop – if a reset password e-mail is requested by a customer using a language for which you have not defined a sendPasswordReminderEmail CMS text, a default password reminder e-mail will be sent.
Changing the password reset e-mail subject line
The subject line of the e-mail is "Password recovery email" per default, however you can change this (and apply translations) at Design > Overall design > Layouts and click the "Texts" tab. Expand the "Application texts" section and find the text key "passwordrecoveryemail_
subject". Change the value of this text and save.
Troubleshooting
-
My CMS texts are only showing for some languages.
Solution: CMS texts are language specific; therefore you have to define the CMS text for any language your shop uses.
-
The password reset e-mail sent to my e-mail is not the one that I created under CMS texts.
Solution: Because the password reset e-mail is a CMS text, it is language specific. This enables you to create a password reset e-mail for each language your shop uses. If a reset password e-mail is requested by a customer using a language for which you have not defined e-mail content, a default password reset e-mail will be sent. If you wish to use the e-mail that you have specified for all languages in your shop, you simply have to define it for all the languages your shop uses.
Solution: Are you sure the CMS text includes the code [[RESTORE_URL]] ? If this code is not present in the CMS text, the system will send the default password reset e-mail.
-
I never receive any password reset e-mail
Solution: If there is more than one shop on the account, you must ensure that the shop group has a default shop specified. Go to Base setup > Webshops > Shop groups > [Select appropriate shop group] > Check that a "Default shop" has been selected.
Solution: Make sure that everything is set up correctly regarding the "SendPasswordLink" bookmark/URL in shop settings.
Solution: Make sure that a default language is set for the shop.