eSeller Cloud comes equipped with an easy way to bulk add product images and product documents. This feature allows you to simultaneously upload many images and files and have them automatically attached to their respective products.
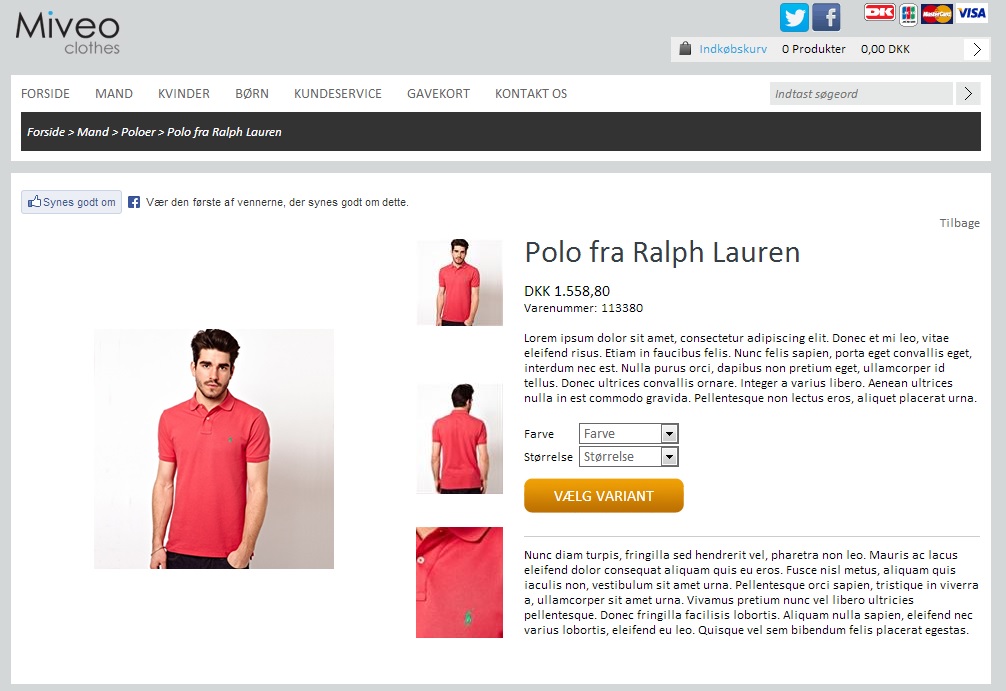
Multiple product images shown in the product detail page of a shop
To bulk upload images or documents the three following steps should be observed:
-
1. Ensure that the images or documents adhere to the naming convention and that they have the correct file extension
-
2. Upload the files to the eSeller Cloud built-in FTP account
- 3. Enjoy a cup of your favorite hot brew while tens or possibly thousands of product images are attached to their respective products.
Contents
Naming conventions and preparation
eSeller Cloud supports the following file formats and extensions Images:
JPG, GIF, PNG (eSeller Cloud does not support images with embedded color profiles)
Documents:
Anything excluding BAT, EXE, COM and other executables
In order for eSeller Cloud to attach the product images to the correct products the files must follow a very specific naming convention as specified below:
dataoriginid_productid_variantid_sortorder_filename.extension
Note that "_" is the filename delimiter and may be changed to another character.
| Data Origin ID |
The ID of the Data Origin from which the product originates (May be left empty) |
String - must not contain the filename delimiter character or forward/backward slash ("/" and "\") |
MyERP |
| ProductId |
The eSeller Cloud external product id |
String - must not contain the filename delimiter character or forward/backward slash ("/" and "\") |
234452397 |
| VariantId |
The eSeller Cloud variant id (May be left empty) |
String - must not contain the filename delimiter character or forward/backward slash ("/" and "\") |
23 |
| Sortorder |
The sort order of the specific image. Used when multiple images are imported for the same product |
Number |
1 |
| Filename |
The filename is the name that the file is given. This may be relevant for SEO purposes |
String - must not contain forward/backward slash ("/" and "\") |
Cuban-cigar |
| Extension |
The file extension |
String [jpg,jpeg,gif,png,docx,xls,pdf,etc] |
.gif |
Examples:
_2343__1_large-flashlight.jpg
An image, large-flashlight.jpg, is attached to the product with ID 2343
_43_2_1_grey-hat.jpg
An image, grey-hat.jpg, is attached to the variant with ID 2 of the product with ID 43
_43_3_1_black-hat.jpg
An image, black-hat.jpg, is attached to the variant with ID 3 of the product with ID 43
_43_3_2_black-hat-closeup.jpg
An additional image, black-hat-closeup.jpg, is attached to the variant with ID 3 of the product with ID 43. The image is shown with sort order 2.
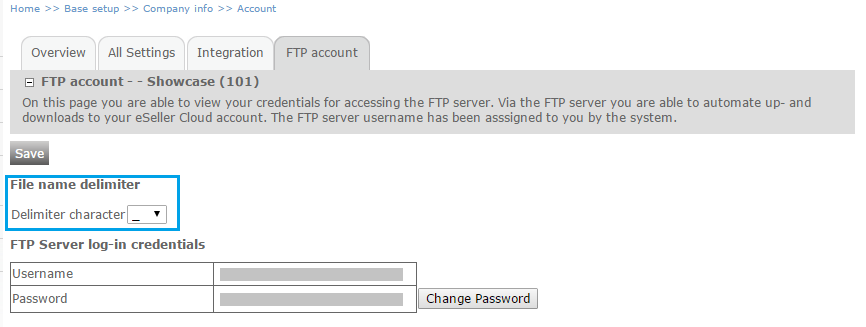
Changing the file name delimiter
The default file name delimiter used for image upload is underscore ("_"). This means that neither the Data origin ID, product ID, variant ID or file name may contain underscore "_" as this character is used as the delimiter for identifying the different segments of the file name.
You are able to change which file name delimiter to use for image upload in the shop administration. Available delimiter characters are: "_-+!@%#[]=". Note that which ever delimiter you choose, netiher the data origin ID, product ID, variant ID or file name may contain this character.
Identifying products from multiple Data Origins
In the majority of cases, it will be alright to omit the Data Origin ID from the file name, hence using a file name starting with an underscore "_", which indicates that no Data Origin ID is specified as in the examples above. However in some cases, for integrated shops with multiple Data Origins, there might be a risk of duplicate ID's among the products, which makes the targeting of products ambiguous. In such cases it won't be sufficient to specify the product ID in the file name, as multiple products originating from different sources (such as ERP systems, PIM systems (Product Information Management) or the shop administration) might have the same ID (external ID).
Import of product images will fail if the following conditions are met:
- More than one product with the same product ID (ext. ID) exist from more than one Data Origin
- No product with this exact product ID originate from the shop administration.
The following examples illustrate how the shop behaves:
- A blue shirt with product ID 1234 originates from an ERP system. Moreover, a large flashlight with the same product ID (1234) originates from a PIM system. When importing an image with the file name _1234__1_file-name.jpg, the shop will not be able to know, whether to assign this image to the blue shirt product or the large flashlight product, because the only identifyer is the product ID, which is identical for the two products. Hence, the import will fail.
-
A blue shirt with product ID 1234 originates from a an ERP system. A large flashlight with product ID 1234 originates from the shop administration. When importing an image with the file name _1234__1_file-name.jpg, the shop will assign the image to the large flashlight, as the space before the underscore "_" at the beginning of the file name indicates, that no Data Origin is specified, and therefore the product must originate from the shop administration. This means that the image will NOT be assigned to the product originating from the ERP system.
-
A blue shirt with product ID 1234 originates from an ERP system. No products from any other sources (e.g. PIM system or shop administration) exist with this exact product ID. When importing an image named _1234__1_file-name.jpg, the image will be assigned to the blue shirt even though no specific Data Origin is specified in the file name, as it is the only existing product with the specified product ID.
In order to unambiguously identify products in cases with multiple Data Origins it is recommended that the Data Origin ID is included in the file name as it is examplified below:
MyERP_1234__1_file-name.jpg
An image, file-name.jpg is attached to the product with ID 1234 that originates from the Data Origin with ID "MyERP". Now, if any other products from any other Data Origin (or the shop administration) exist with the same product ID, these will not have the image attached to them.
Identifying product and variant IDs
When working with shops that are integrated with ERP systems, the Product and Variant ID’s are normally identical to the Product and Variant Ids of the ERP system and it is often easier to identify the id’s within the ERP system.
Product IDs can be found in the eSeller Cloud administration interface by looking at the field “External Item Number” on the product detail page (Home > Stock > Product editing > Product list > Edit product)
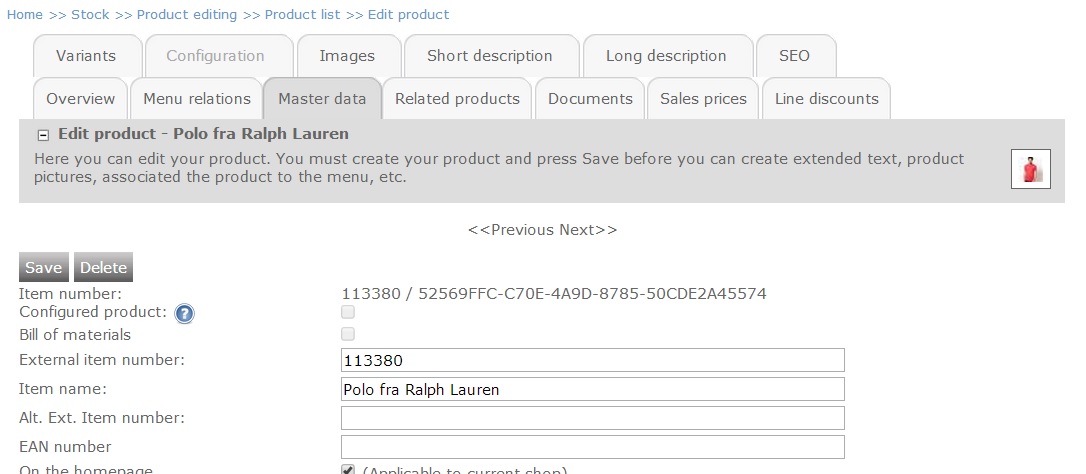
External item number 113380
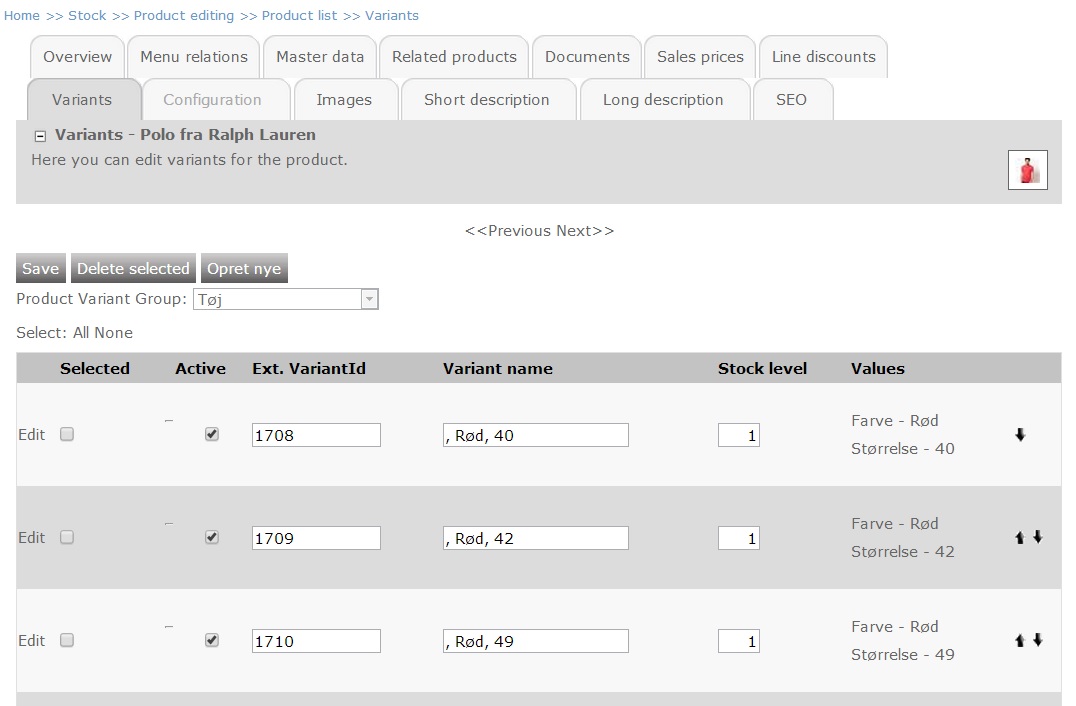
Variant IDs are found in the eSeller Cloud administration interface by looking at the field “Ext. Variant Id” on the “Variants” pane for the specific product. (
Home > Stock > Product editing > Product list > Variants)
Identifying Data Origin IDs
The Data Origin ID is found in Integration > Import/Export > Account Integration and selecting the Integration tab. The Data Origin ID is displayed under "Ext ID" (highlighted with a blue box in the image below.
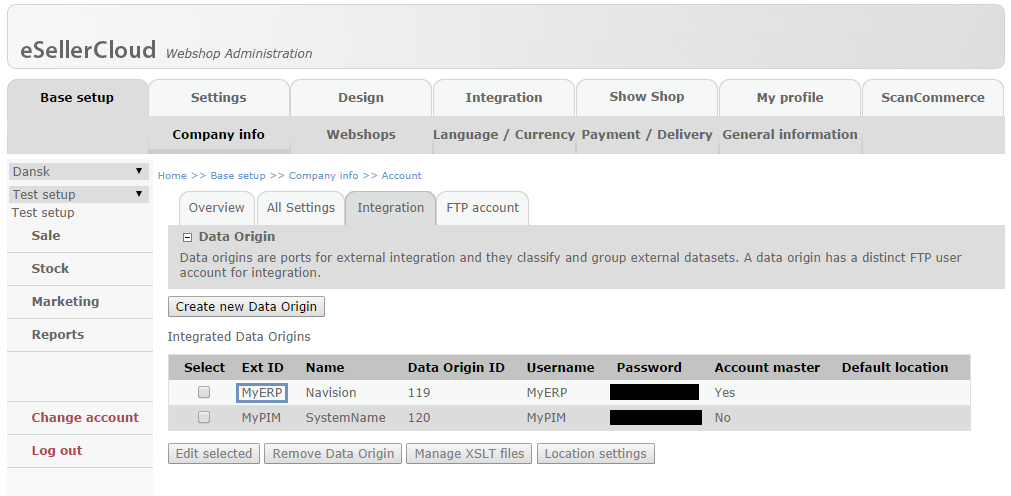
Note that you might have more than one Data Origin as it is illustrated in the image above.
Uploading the images
Once the images adhere to the above naming conventions the files must be uploaded to the eSellerCloud FTP server. To upload images you should connect to ftp.esellercloud.com using the same credentials used for login into the eSeller Cloud administration interface. You can use any FTP client to do so, for instance FileZilla.
NOTE: You must use the same credentials as you use to log in to the eSeller Cloud shop administration or the account FTP login - NOT the data origin credentials!
Once logged in you will see one or more folders with numbers as names. The numbers of these folders corresponds to the id of the eSellerCloud accounts you have access to. If you have access to more than one account, you can identify the id of you account by looking at the top right corner within the eSeller Cloud administration interface is shown in the illustration below:

Account id 162
Navigate to the appropriate folder on the FTP Site and navigate to the folder ProductFiles\Images. Copy the files from your local machine to the FTP folder. Once the copy operation has completed, you can verify that the products have been correctly attached to products by looking in the eSeller Cloud administration interface.
Overwriting existing images
Images can be overwritten simply by uploading a new image with the same product ID and sort order as the file you wish to overwrite.
Example:
The image "_1234__100_blue-shirt.jpg" exists in the product image folder.
By importing the file "_1234__100_red-shirt.jpg", the existing image is overwritten with the new image.
Changing sort order of images
Sometimes it might be desirable to change the sort order of an image. Changing the sort order of an image is done easily by simply uploading an image with a different sort order and the same file name. Observe the example below:
The image "_1234__100_blue-shirt.jpg" exists in the image folder.
By importing the file "_1234__500_blue-shirt.jpg", the existing image is overwritten with the new image (thereby also changing sort order to 500).
This means that after the import, the file "_1234__100_blue-shirt.jpg" no longer exist - in stead the file "_1234__500_blue-shirt.jpg" exists in the image folder.
Note that this behaviour entails that it will never be possible to have two images with the same file name and two different sort orders for the same product (e.g. "_1234__10_blue-shirt.jpg" and "_1234__70_blue-shirt.jpg") - each image attached to a product must have a distinct file name.
FTP uploading large quantities of product images.
When bulkuploading a large number of product images upload speed drops of as the number of files increase because FTP clients often try to retrieve a directory list after each upload. This is unnecessary and means that image upload becomes very time consuming.
To get around this problem we recommend either disable directory updates after each upload in the ftp client or using the windows command line ftp client in non-interactive mode. The latter can be done in the following way:
Click “Start” >> “Run” Type “cmd” and click enter
In the command prompt type “ftp” and click [Enter]
Type “open ftp.esellercloud.com”
Enter your username (your email address)
Enter your password (the password you use to login to the eSeller Cloud administration)
Navigate to the image directory by typing:
“cd [you account id]” [Enter]
“cd ProductFiles” [Enter]
“cd images” [Enter]
Put the ftp client in non-interactive mode by typing:
“prompt n” [Enter]
Use binary transfer mode for transferring images:
"binary" [Enter]
Upload the product images by typing
“mput c:\PathToYourImages\*.*” [Enter]
Wait
Notes
We recommend that you initiate a bulk upload by uploading one or a few files and check that the files are associated with the correct products. Once you are sure that the naming is correct, you can upload larger batches.
Should you mistakenly upload images or files to the wrong product, you are able to delete these images/files via FTP. However, if the images/files cannot be matched with any products (if for instance you use a Product ID that does not exist in the filename), the FTP transfer will fail for these unmatched files.