This article describes setting up a design in an eSeller Cloud webshop. The steps covered include defining a template, setting up a page design, adding shop elements, creating content designs and pages.
Using the template designer
In the template design you define the placement of content in the webshop by specifying containers, which may hold shop elements as well as a content area, which can hold a content design. This is where you create the overall layout structure of pages, e.g. implementing a responsive framework. Besides specifying containers and the content area you’re able to use HTML and scripts to define the template. The template designer provides 100% freedom of defining the layout in any way you wish and allows you to implement responsive frameworks such as Bootstrap or Foundation.
Containers are used as placeholders where shop elements can easily be added using the page designer. The content area is where the content design of a page will be placed – e.g. the part of the page displaying the product information such as product name, product description, sales price, image etc.
Usually a webshop consists of a few templates; one for each page layout – e.g. one for the front page, one for checkout pages and one for the rest of the pages such as product lists, product detail pages and CMS pages.
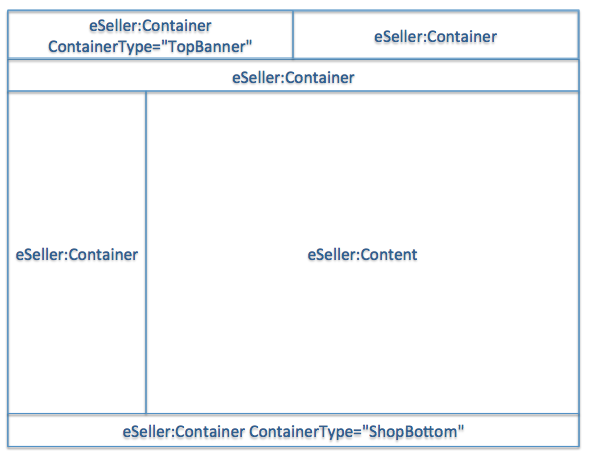
Above you see an illustration of an example of a template layout using different containers to define the areas as well as defining the main content area, where the content design of the page will go.
Creating a new template
A new template is created simply by copying and altering an existing template. The templates are found at Design > Overall design > Design templates in the shop administration. Select the template you wish to copy and click the “Copy” button. You will be asked to confirm the action before the copy is made.
The new template will get a name, which you can change if you like. The new template contains the same definition and files as the copied template. You can alter these to your liking until you are satisfied with the template.
Below you see a very simple example of a template definition:
<div id="main">
    <div id="topArea">
        <div id="topAreaLeft">
            <eSeller:Container ContainerName="topArea" ContainerType="TopBanner" CssId="#topAreaLeft" />
        </div>
        <div id="topAreaRight">
            <eSeller:Container ContainerName="topAreaRight" CssId="#topAreaRight" />
        </div>
    </div>
    <div id="topMenuArea">
        <eSeller:Container ContainerName="topMenu" CssId="#topMenuArea"/>
    </div>
    <div id="contentArea">
        <div id="leftContentArea">
            <eSeller:Container ContainerName="leftContent" CssId="#leftContentArea"/>
        </div>
        <div id="mainContentArea">
            <eSeller:Content ContainerName="contentArea" CssId="#mainContentArea" />
        </div>
    </div>
    <div id="footerArea">
        <eSeller:Container ContainerName="footerArea" ContainerType="ShopBottom" CssId="#footerArea" />
    </div>
</div>
This example template consists of a few containers as well as a content container for a content design (<eSeller:Content>).
By specifying CSS selectors (CssId attribute) it is possible to style the divs surrounding the containers using the functionality in the Styling tab.
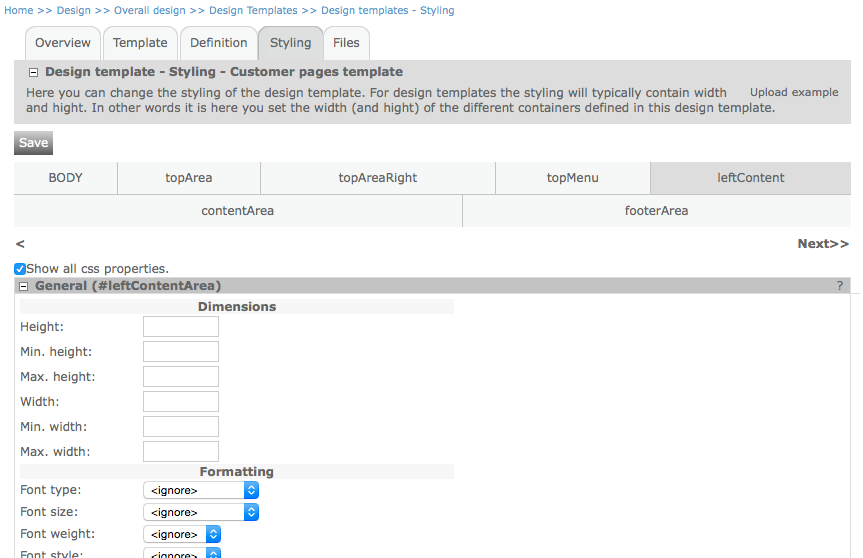
You can read more about the eSeller:Container and eSeller:Content tags HERE.
A template is used by one or more page designs, set up in Design > Overall design > Page designer.
Setting up a page design to use a template
In order to use the new template, you have to set up a page design to use the template. You can either select to use the template on a new page design or on an existing page design (note that this will remove any existing page design styling of any containers that do not exist in the new template).
What is a page design?
A page design defines a type of page in the shop with a specific template, e.g. the product detail page, the product list, CMS pages, front page, checkout pages etc. A page design may be used by many pages in the shop. In the page design you specify what shop elements to include in the containers defined in the template. There are lots of different shop elements to choose from (e.g. customer login boxes, search field, language selector, banner campaigns, etc.) – and you are able to define your own shop elements (as content designs) and add these to the page design as shop elements.
Page designs are found at Design > Overall design > Page Designer.
Below you see an example of a page design:
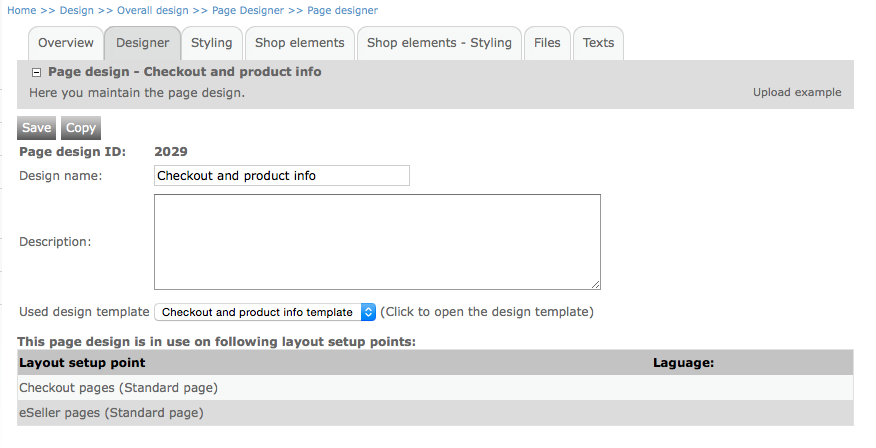
This page design is named “Checkout and product info” and is used by the layout groups “Checkout pages” (such as myshop.com/basket/shoppingcart.aspx and myshop.com/basket/shoppingcart_step3.aspx) as well as the layout group “eSeller pages”, which in this case covers the product detail page. As you can see in the image, this page design uses the template “Checkout and product info template”.
Creating a new page design
Let’s create a new page design, select a template and add some shop elements.
At Design > Overall design > Page Designer, click the “New” button to create a new page design.
Name the new page design, enter a description (optionally) and specify which template to use – click “Save”.
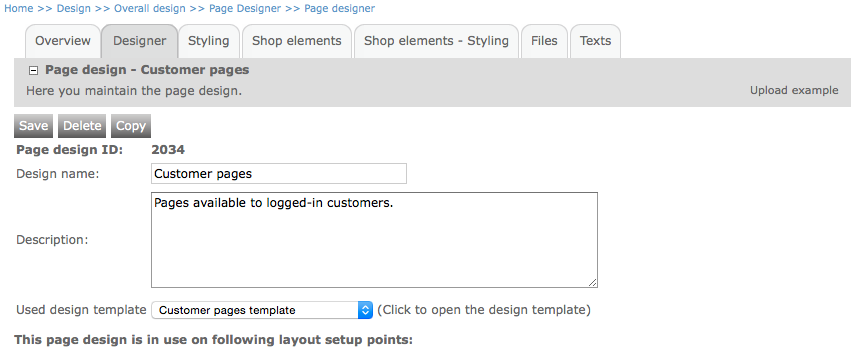
Now you’re able to add shop elements to the page design.
Go to the “Shop elements” tab. Here you can see the containers that you defined in the template. Moreover you can see two additional containers which relate to the <eSeller:Content> element in your template – these are created by the system. They are called "[content container name]Top" and "[content container name]Bottom" and they are placed above and below the content container in the template. Note that you will not see the <eSeller:Content> container in the page design, as this is reserved for a content design and cannot contain shop elements.
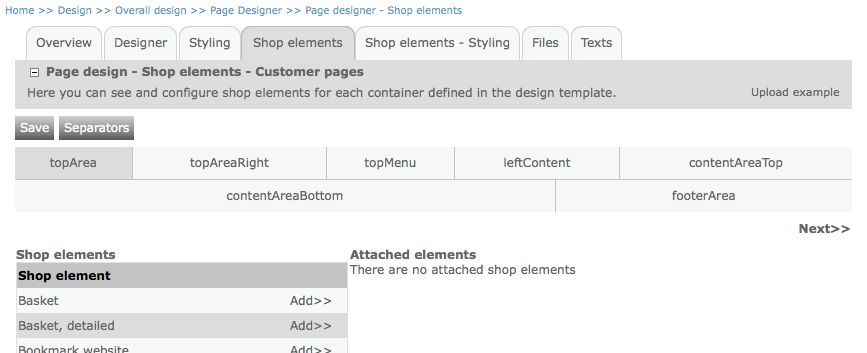
From here you’re able to add shop elements to the different containers. Note that only containers for which the attribute AllowShopElements is “True” in the template definition may hold shop elements.
What are shop elements?
Shop elements are small pieces of ready-made functionality that can be placed in containers defined in the template of the shop. By using the Page designer you’re able to easily place functionality such as customer login boxes, search fields, language selector etc. in any of the defined containers.
Adding shop elements
Add a shop element to a container by clicking the “Add>>” text.
When you’ve added a shop element, you are able to specify whether the shop element should be visible in the shop for logged-in customers and non-logged-in customers. You can arrange the placement of the shop elements by using the up/down arrows.
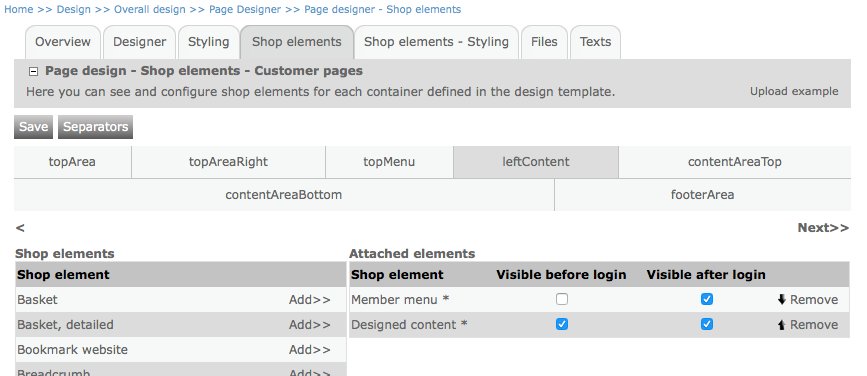
By clicking the name of the shop element you’ve added, you’re able to configure the shop element.
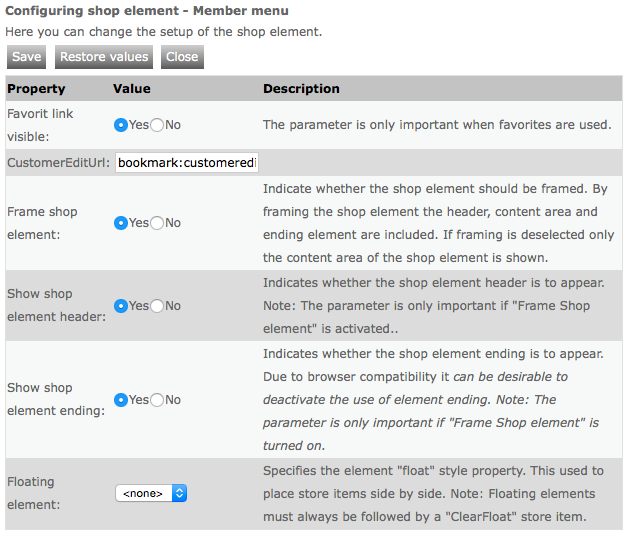
Configuration of a shop element.
It is also possible to add content designs as shop elements. All you have to do is to create a content design under the “Shopelement design” option at Design > Overall design > Content designer.

Then, in page designer, you add the shop element called “Designed content” and simply select the content design you’ve just created.
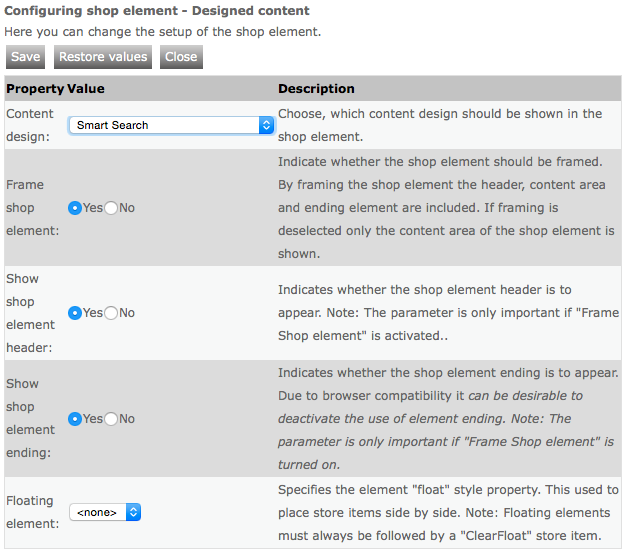
Selecting the content design to use as a shop element. In this example the content design “Smart Search” is selected.
Setting up a page
Now that you’ve set up a page design with the desired shop elements, you can create a page, which uses this page design. The shop layout is found at Design > Overall design > Layout – Setup.
Layout setup
The layout setup is where all pages of the webshop are managed in terms of page design, bookmarks, content design etc. At this page you see a tree of all pages in the webshop. Per default eSeller Cloud consists of some standard pages such as pages for the CMS menus, the product list, the product detail page and the 404-page. Note that the names can be altered and therefore may be different in your shop.
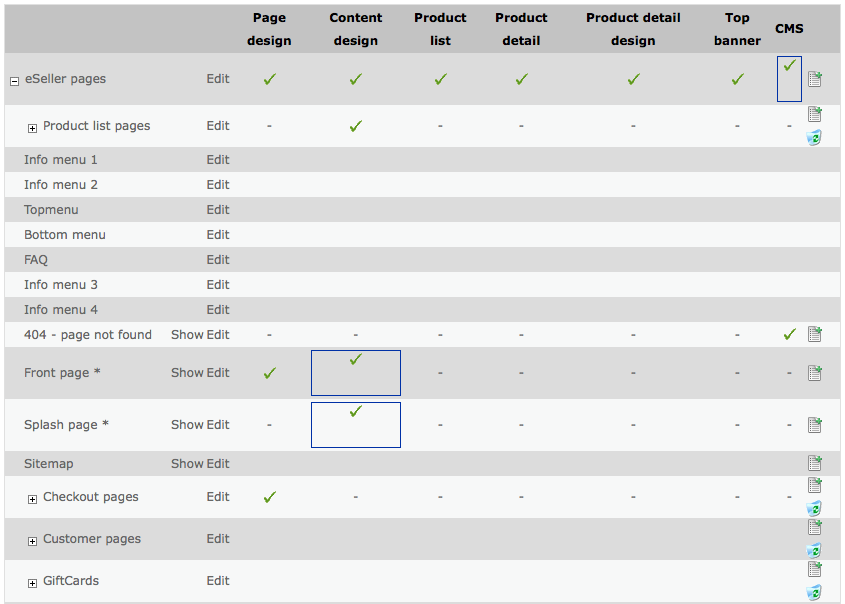
Example of a layout setup. The standard pages cannot be deleted but can be configured (or just ignored). The asterisk after the page name means that a bookmark has been specified for the page. A checkmark in the “Page design” column means that a specific (un-inherited) page design has been set on the layout. A checkmark in the “Content design” column means that a content design has been specified for the layout. A blue box means that the setup of the page is not inherited to points below (child pages).
You can create a new page by clicking the “new” icon to the far right. The page is created as a child of the page for which you click the icon.

Name the page and select a folder name – “/customers/”, “/page/” or “/basket/”. The folder name will be part of the URL of the page. If you name the page “orderHistory” and select the folder name “/customers/”, then the page will get the URL “http://www.myshop.com/customers/orderHistory.aspx”. If you select the “Grouping page” option, the page will not get a URL but rather will function as a grouping parent for other pages. Note that once a page has been created, you cannot change its URL.
When you’ve created the new layout, you’re able to configure it. Click the “Edit” text next to the page that you just created in the layout tree and go to the “Page design” tab.
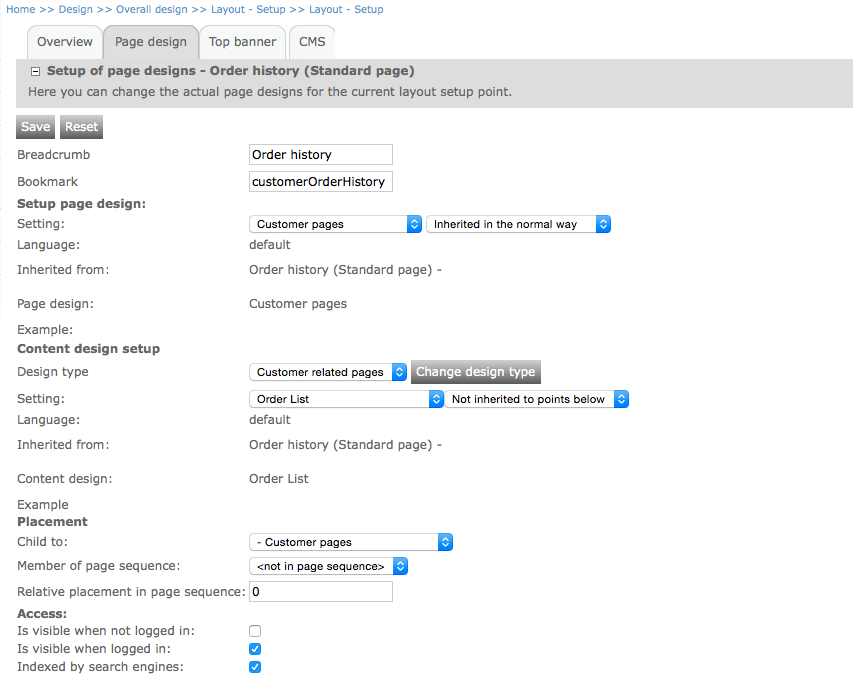
The “Breadcrumb” holds the text that will be showed by the breadcrumb shop element in the webshop.

Example of a breadcrumb in the shop.
You’re also able to specify a bookmark for the layout, e.g. “customerOrderHistory”, which can be used by for instance runtime values to get the URL of the page. Some shop settings also require the use of bookmarks to identify certain types of pages, e.g. specifying the bookmark of the customer password reset page in the shop settings.
Setup page design
In the “Setting” drop-down you’re able to select which page design to use for the page – or you can choose the “<inherited>” option, which will make the page inherit the page design setting from the parent page. If you select a specific page design you’re also able to specify whether the page design setting should be inherited to child pages. If the page design setting is not inherited to child pages, the child page will per default in stead inherit the page design setting of the next ancestor, which allows the page design setting to be inherited to child pages.
If you select the <inherited> page design setting, you can see below from which page the setting is inherited along with what page design is inherited.
Setup content design
You are able to specify which content design to use on the page. The content design will be placed in the <eSeller:Content> container defined in the used template.
Select a content design by firstly selecting the appropriate content design section and clicking “Change design type” – now the drop-down list below is updated with all content designs from the chosen section. If you wish the page to inherit the content design of a parent, choose the <inherited> option. Below the drop-down you will be able to see from which parent the content design setting is inherited as well as which content design is inherited.
Placement
In the “Child to” drop-down you can change the parent page of this page (just for visual organization in the layout tree).
The “Member of page sequence” setting allows you to specify whether the page is part of a page sequence – currently only the “Order checkout” sequence is available, and only pages that are part of the checkout process should use this – otherwise just leave it at its default setting “<not in page sequence>”.
The “Relative placement in page sequence” setting is only useful if you’ve selected a page sequence in the setting above. By entering a number you specify the placement of the layout in the sequence.
Access
Under the “Access” settings you can configure whether the page should be visible when a customer/sales person is logged in as well as whether the page should be indexed by search engines. If this last option is not checked, the element <meta name="robots" content="noindex,nofollow"> will be added to the page, preventing search engine crawlers from indexing the page.
Top banner
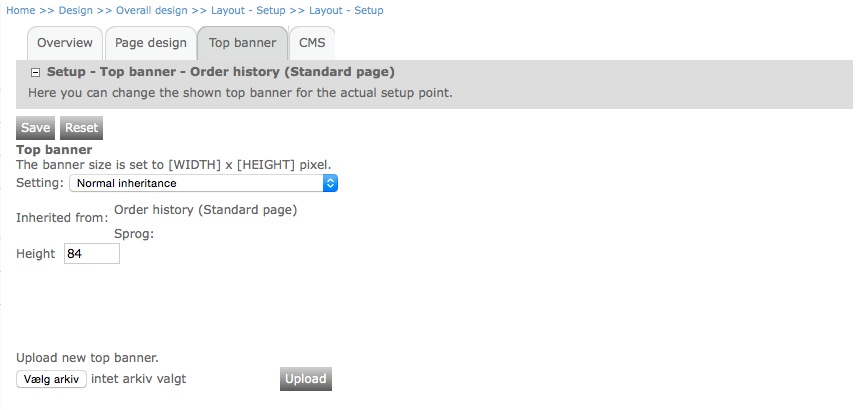
You are able to add a top banner image specific to the page by accessing the “Top banner” tab. If no specific top banner image is uploaded, the top banner image is inherited from the parent page. If you upload a new top banner image, you can specify whether the top banner image should be inherited to child pages. The top banner image is placed in the <eSeller:Container> with the ContainerType “TopBanner” provided that this exists in the template definition.
CMS
Accessing the CMS tab you’re able to provide a CMS text to display on the page. In order to display the text on the page, you must ensure that the shop element “Layout specific CMS” is added to the page design.
As with the other page settings, you are able to specify whether to use a specific CMS text for the page or to inherit it from a parent – and likewise it is possible to select whether the specified CMS text is to be inherited to child pages.
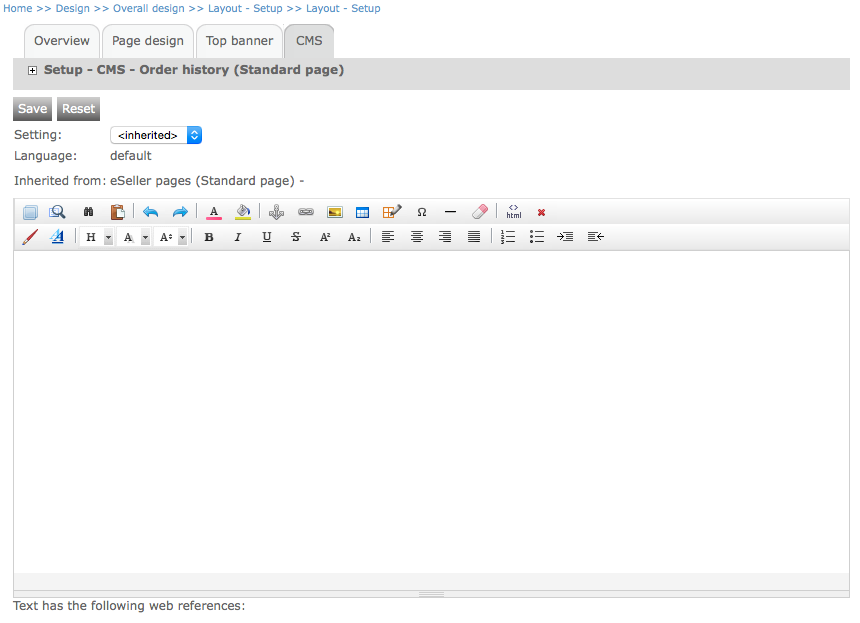
Note that it is not possible to provide translations for this text – the layout CMS text will remain the same across all languages.
Creating content designs
Content designs hold the main content of the pages in your webshop. The definition of a content design may hold HTML, CSS, scripting and eSeller tags – read more about those HERE. In the page configuration it is possible to select which content design to use, and the chosen content design is then placed in the <eSeller:Content> placeholder in the template.
You find the content designs at Design > Overall design > Content designer.
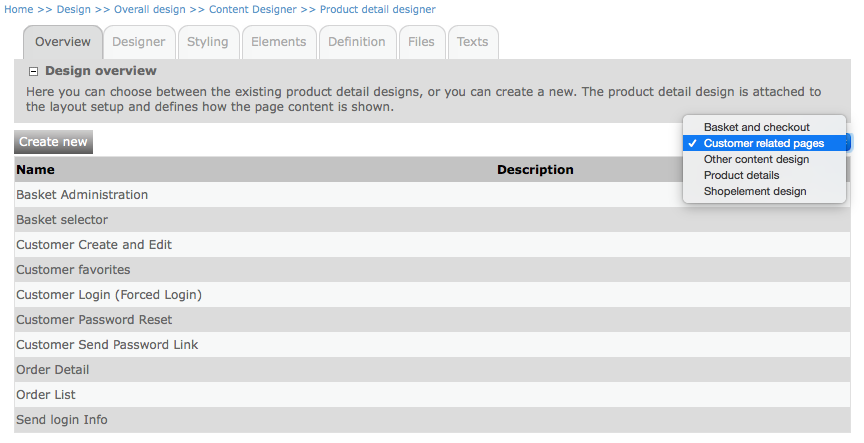
Content designs are divided into different “sections” for easier navigation; Product details, Shopelement design, Other content design, Customer related pages and Basket and checkout. You can freely choose in which section to create a new content design, however you should be aware that only content designs created in the “Shopelement design” section may be used as shop elements in the page designer.
Create a new content design by selecting the appropriate section and clicking the “Create new” button.
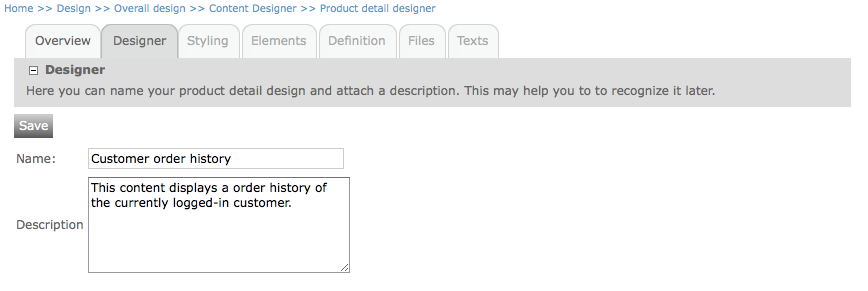
Name the content design and provide a description (optional) – click “Save”.
When the content design has been created, you are able to access the different tabs for setting up the content design.
Go to the “Definition” tab – here you see a text editor. Add the content you’d like, e.g. HTML, CSS, Script or eSeller tags. When you’re done, click “Save”.
In the “Elements” tab you are able to see all eSeller controls added to the definition of the content design – and some of them you are able to configure.

In the “Files” tab you are able to upload files such as scripts or external CSS files to use with the content design.
In the “Texts” tab you are able to specify texts and translations for texts relating to the content of the content design – e.g. some controls may render texts, which you can see and change here.
Design texts may contain maximum 4000 characters. Texts created using the eSeller:Select "text" tag may have text keys of maximum 100 characters.
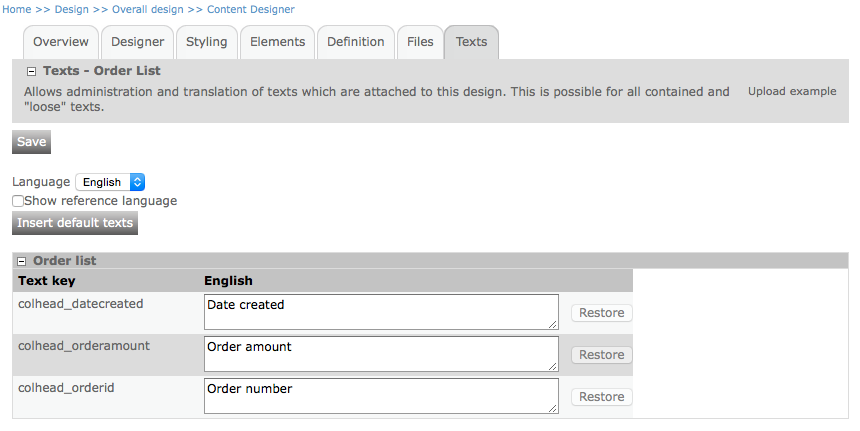
The “OrderList” control, which is placed in this content design definition, has three texts, which can be changed and translated from here.
NOTE that the content design texts will not be visible here until a page using the content design has been accessed in the shop front at least once.
Now your new content design is created and can be used either as a shop element (if created within the “Shopelement design” section) or as the main content of a page.