Before you start setting up your countries and regions, make sure you have your customer templates ready. For more information about adding customer templates, please see customer templates.
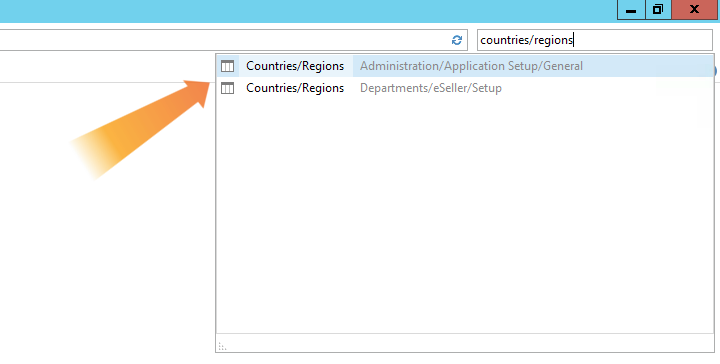
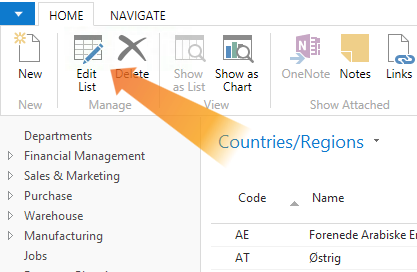
To set up the countries or regions available in the shop, use the search field in the top right to search for “Countries/Regions” and select one as shown below.
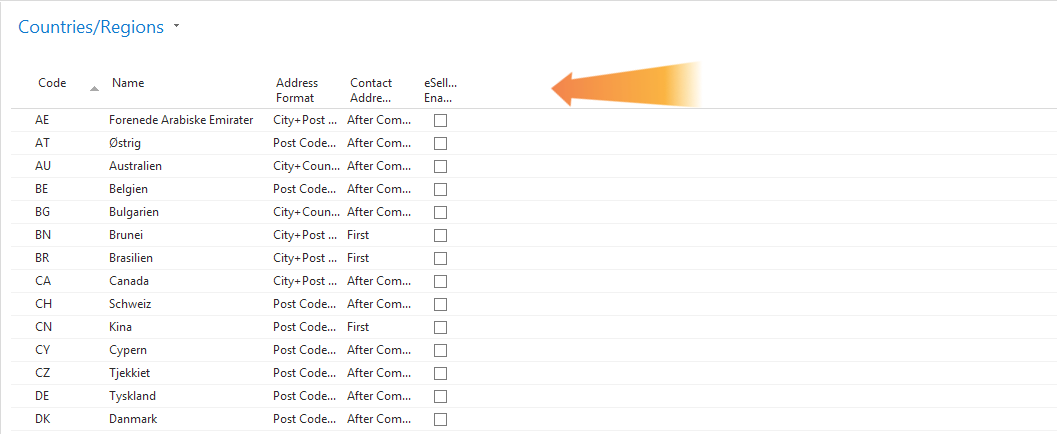
Check to see if you can see the column “OIOUBL Country/Region Code” in the list.
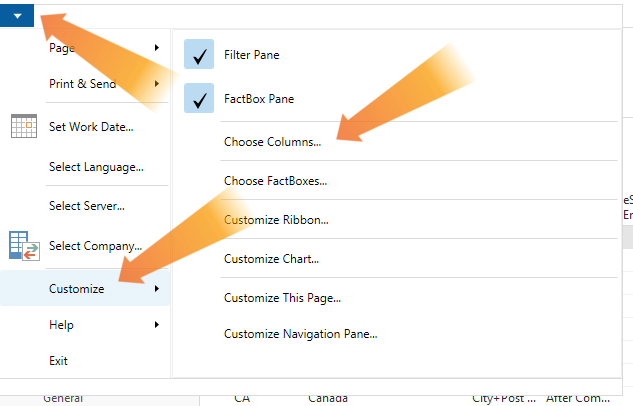
If it is not there, like shown in the example above, click the blue arrow in the top left corner >> Customize >> Choose Columns…
This opens a new window, where you can add columns to the list. Select “OIOUBL Country/Region Code” from the list to the left and click the “Add” button.
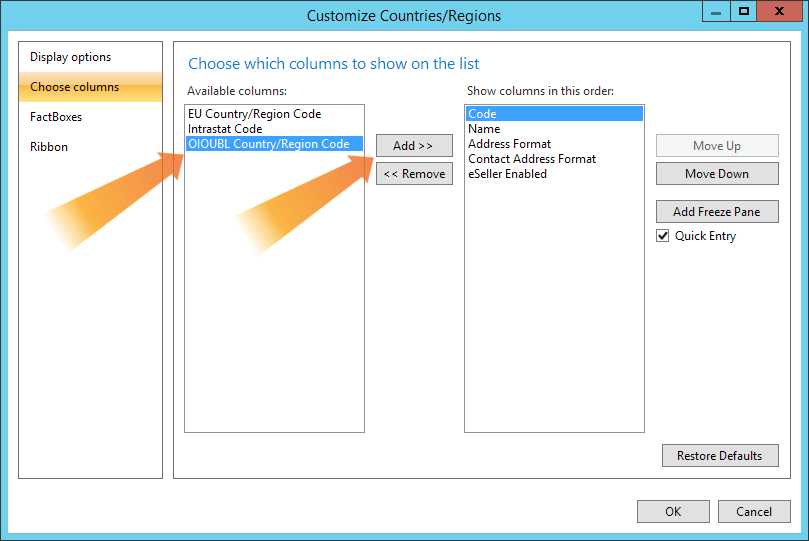
This will add the column to the list on the right, which is the columns visible in your list.
Click “OK” to close the columns window, and you are ready to continue setting up your countries and regions.
To edit the list of countries, click “Edit List” in the top left corner.
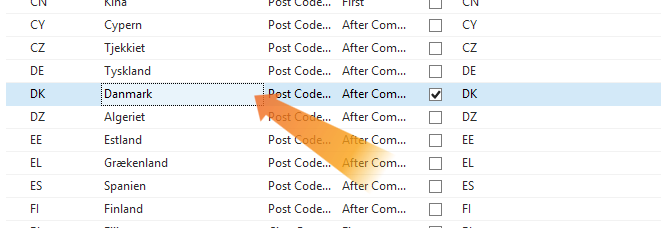
To activate each country and/or region needed, check off “eSeller Enabled” to the far right of the list, and if it is not already included, make sure the ISO country or region code has been added under “OIOUBL Country/Region Code”, as shown below.
To find the ISO Country or Region code, please see ISO country codes.

Press “OK” to close the Edit - Countries/Regions window, and you’re ready to add customer templates to each country or region.
Adding a customer template to a country or region
Before you begin to add customer templates to a country or region, make sure you know which shop code is the default shop code from eSeller.
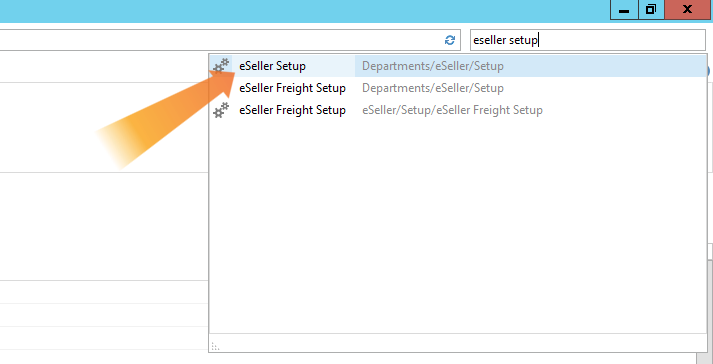
If you do not know the default shop code, it can be found by searching for “eSeller Setup” in the search field, which can be found in the top right corner, and selecting “eSeller Setup” as shown below.
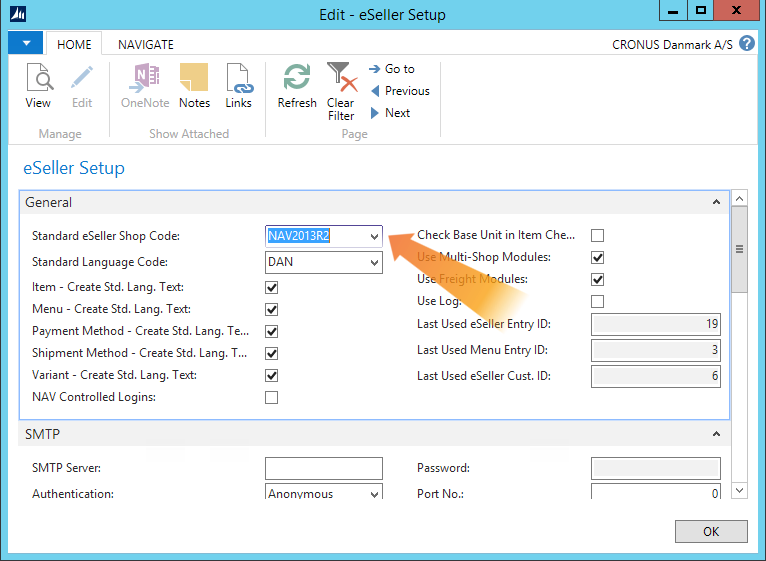
This will open a new window, where you can see the Standard eSeller Shop Code as shown below. In this example it is NAV2013R2.
When you are done, simply close the window and you are ready to begin adding customer templates to countries and/or regions.
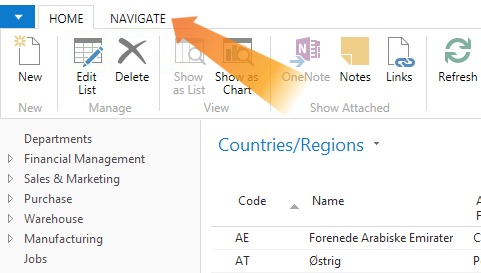
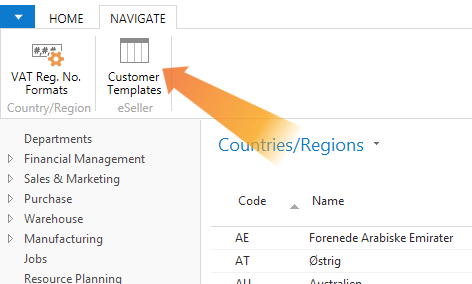
To start adding customer templates to each eSeller enabled country, click the “Navigate” tab in the top left corner, as shown below.
Select a country or region from the list you want to add a customer template to.
Then click “Customer Templates” in the top left.
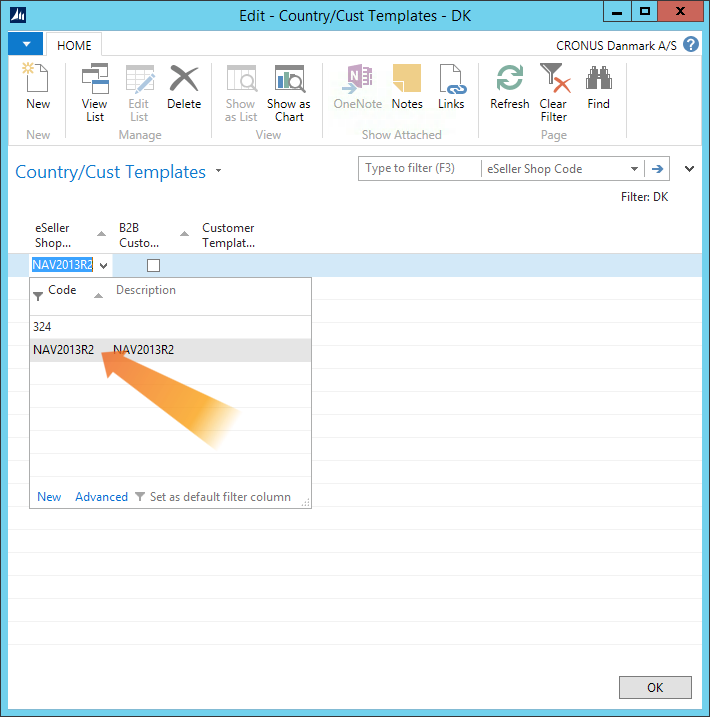
This will open a new window where you can add customer templates to the selected country.
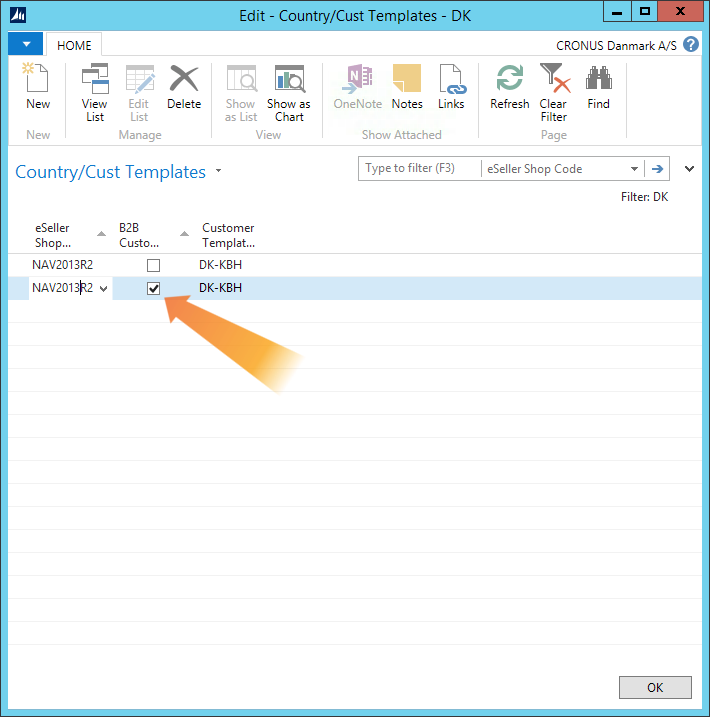
In the column “eSeller Shop Code”, you can use the dropdown to add a shopcode. You typically only do this for the default shop code from eSeller.
In the column “Customer Template Code” you can use the dropdown to select the customer template you want to use.
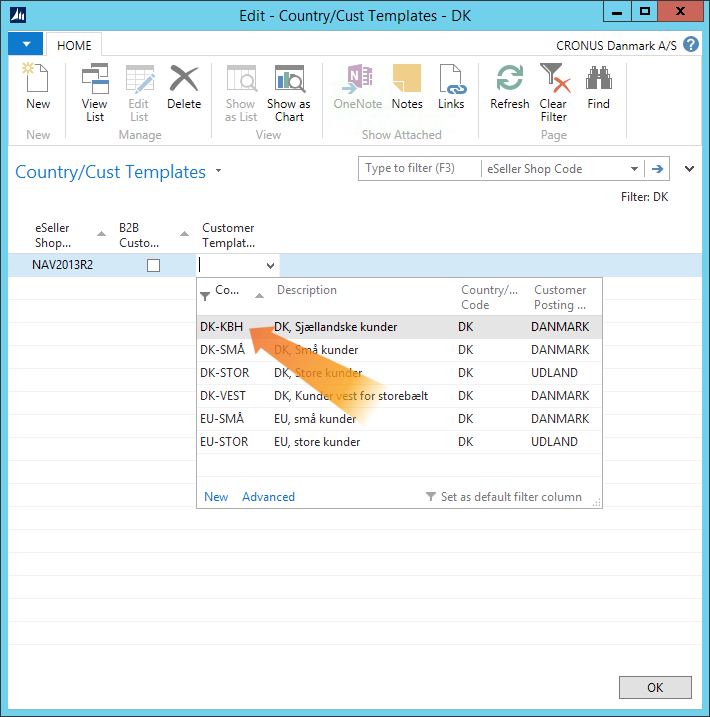
Typically you should add two rows to each country, one for B2C customers and one for B2B customers. The only difference between them is that for the B2B row you need to check off “B2B customer” as shown below.
Click “OK” and you are ready to add customer templates to the next country or region.